

Disclaimer
The community here at 355nation.net urges you to please use caution and seek professional assistance when performing modifications to your vehicle. Before attempting any modification it is advised that you refer to your Colorado or Canyon service manual or contact a certified mechanic as not all GMT355 trucks are the same. The staff and the associated members are in no way responsible for any damages, injuries or other harm inflicted to your vehicle or yourself which may result in attempting these modifications. The posts and content presented on this site reflect in no way the views of 355nation.net or it’s ownership.
![Image]()
A 355nation How To presented by
beaver76
Project Name
07 GP seats
Project Description
How-to install 2007 Grand Prix seats into your 355
Skill Level
Moderate
Project Vehicle
Make: Chevrolet
Model: Colorado
Year: 2006
Engine: 3.5L
Power windows: Yes
Sun Roof: No
Tools Needed
Basic sockets, screwdrivers, a drill, something to cut thick ass metal, i used a grinder with a cutoff wheel
Project Time
Depends on how fast you work
Project Cost
That can vary from 0 to 1000 plus effort
First thing to start with on this project is to remove all the current mounting rails from the GP seats. This plate will also need to be removed and the tabs cut off.
![Image]()
The plates will then need to be cut like this to allow room for the seatbelt bracket.
![Image]()
This cut should line up where bottom seat support dip is.
![Image]()
Now you need to remove your seats from the truck. Their will be 4 bolts that hold the seat back to the frame rails. These are 10mm bolts and you will have to acess them by pulling the material back from the frame.
![Image]()
make sure to remove the componets from the passanger side seat for the airbag sensor and place it into the passanger side GP seat. As you can see the 355 rails are going to have to be cut in order for them to mount onto the GP seat.
![Image]()
A cut will need to be made here an all 4 sides. Get as close as you can to the seatbelt mount but dont cut into it.
![Image]()
You dont have to cut off as much as I did either just as long as you clear the seat mount.
![Image]()
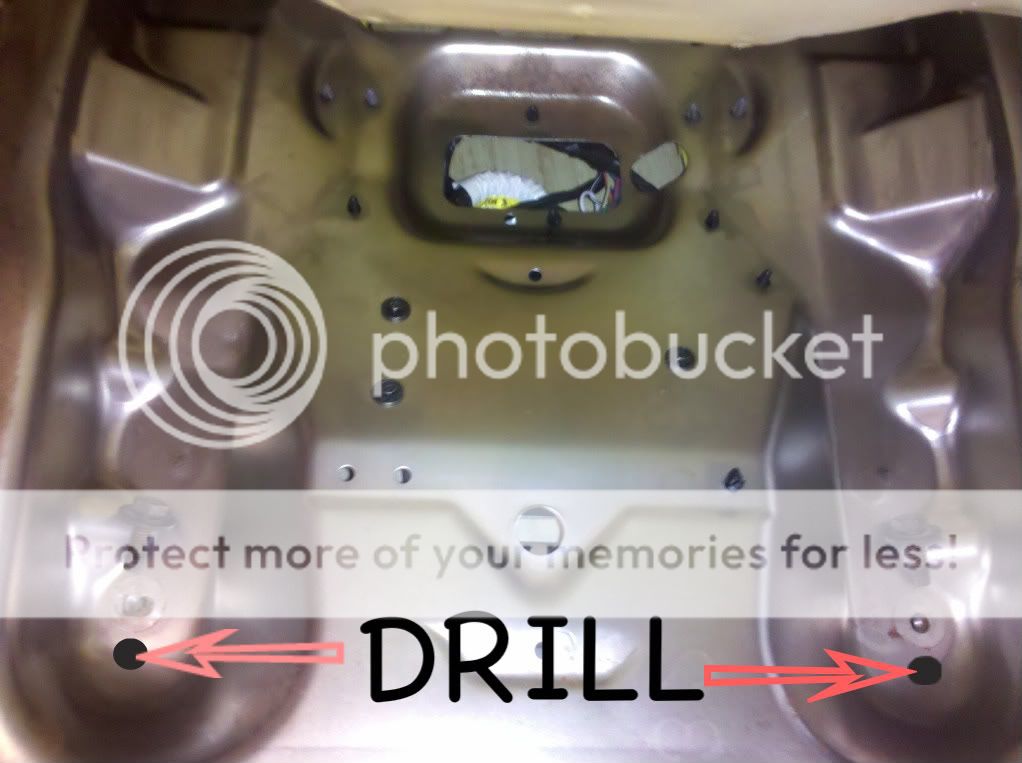
now you are ready to start the process of mounting you new seats to the old rails but first measure and make for the holes that will be needed here.
![Image]()
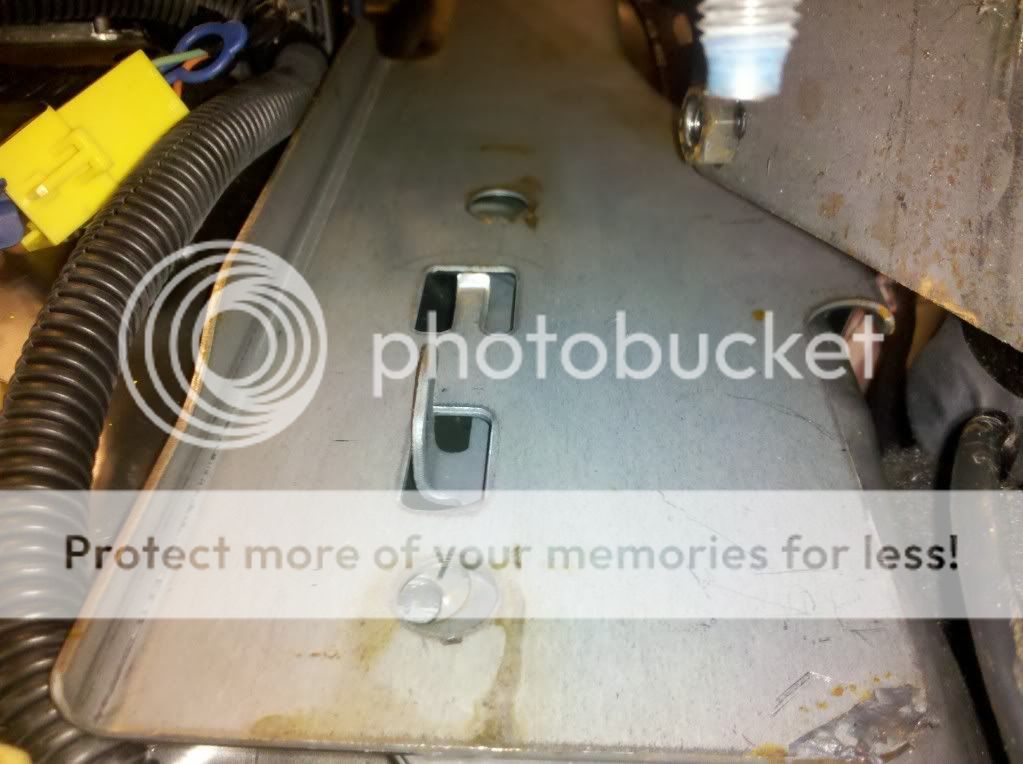
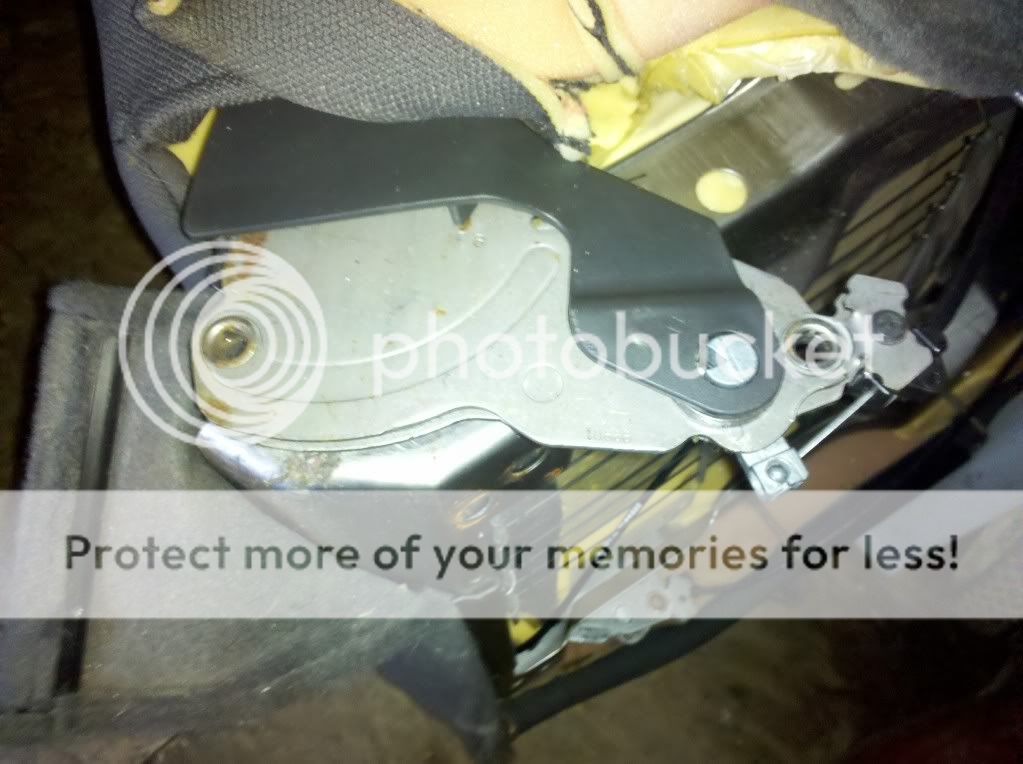
As you will notice their is a control box under the seat that will need to be left there but this causes a problem for the position sencer. I pulled the bolt and drilled a new hole and bent the bracket over and replaced the bolt.
![Image]()
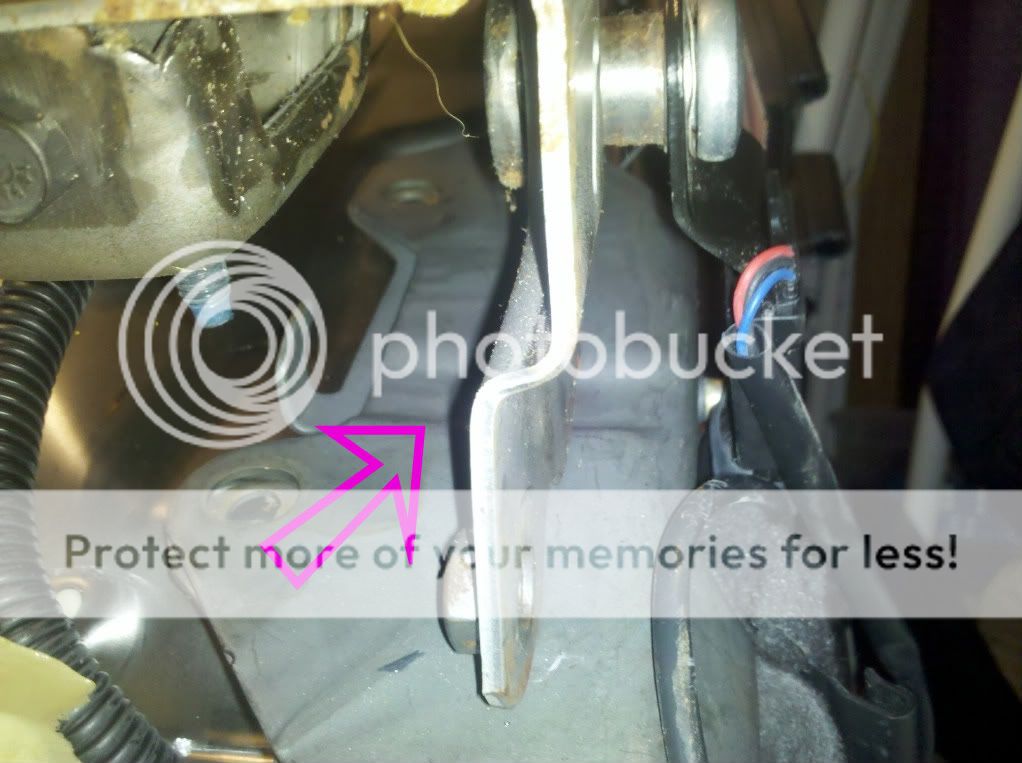
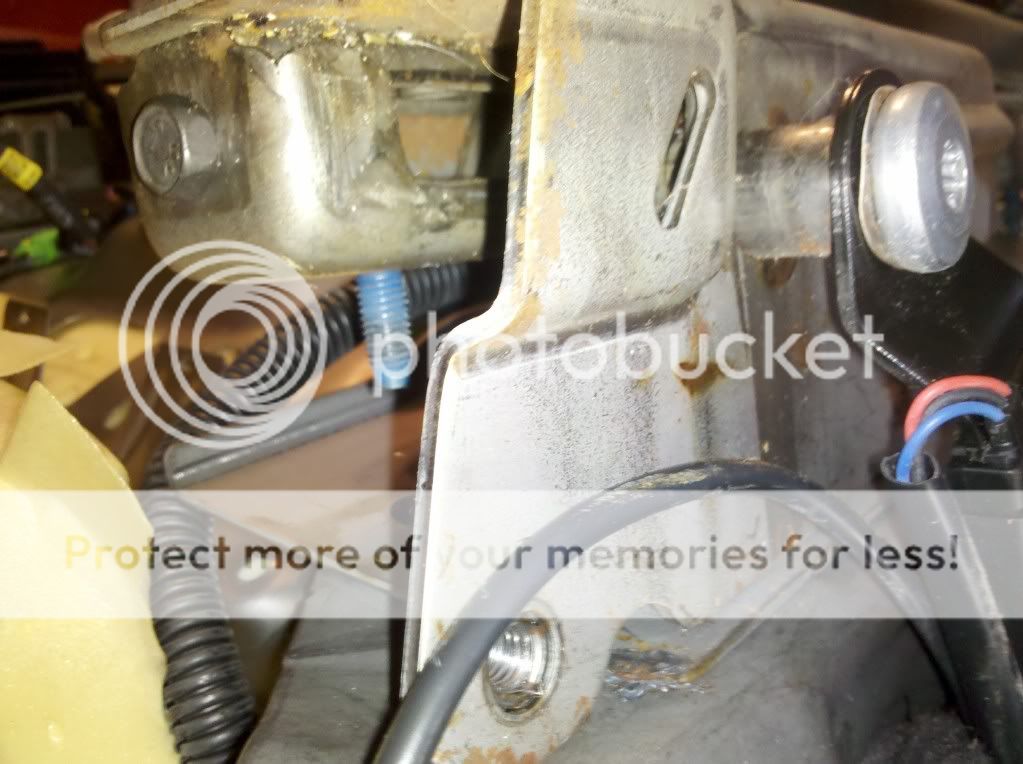
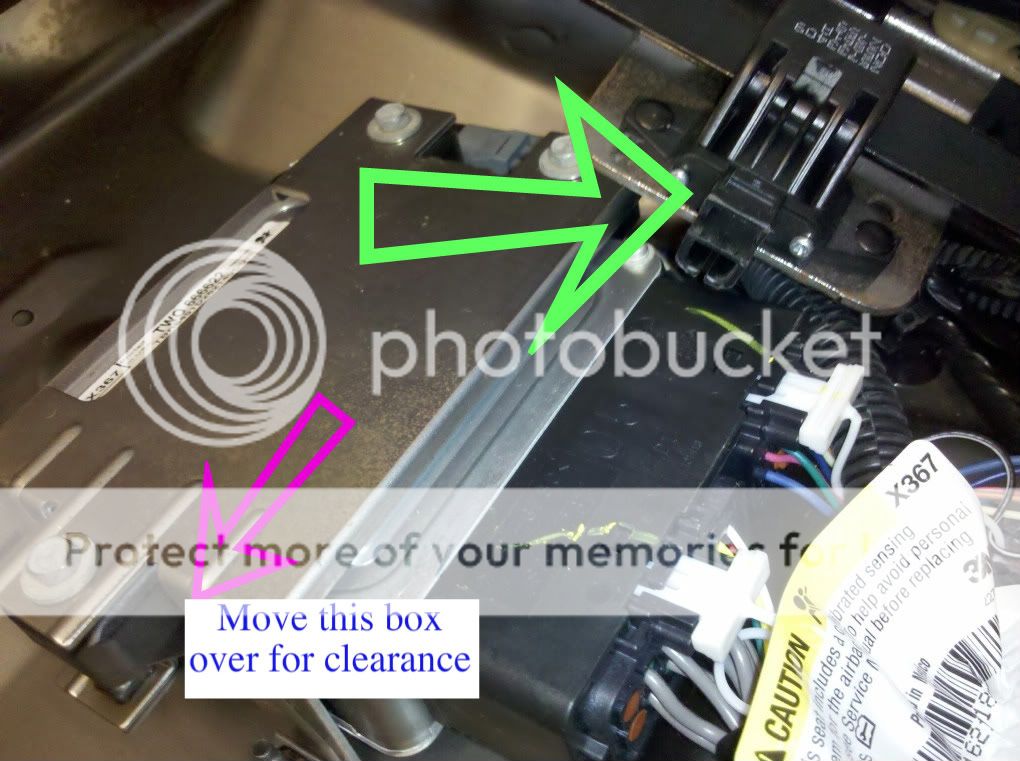
This wil need to be moved over a lil bit to clear.
![Image]()
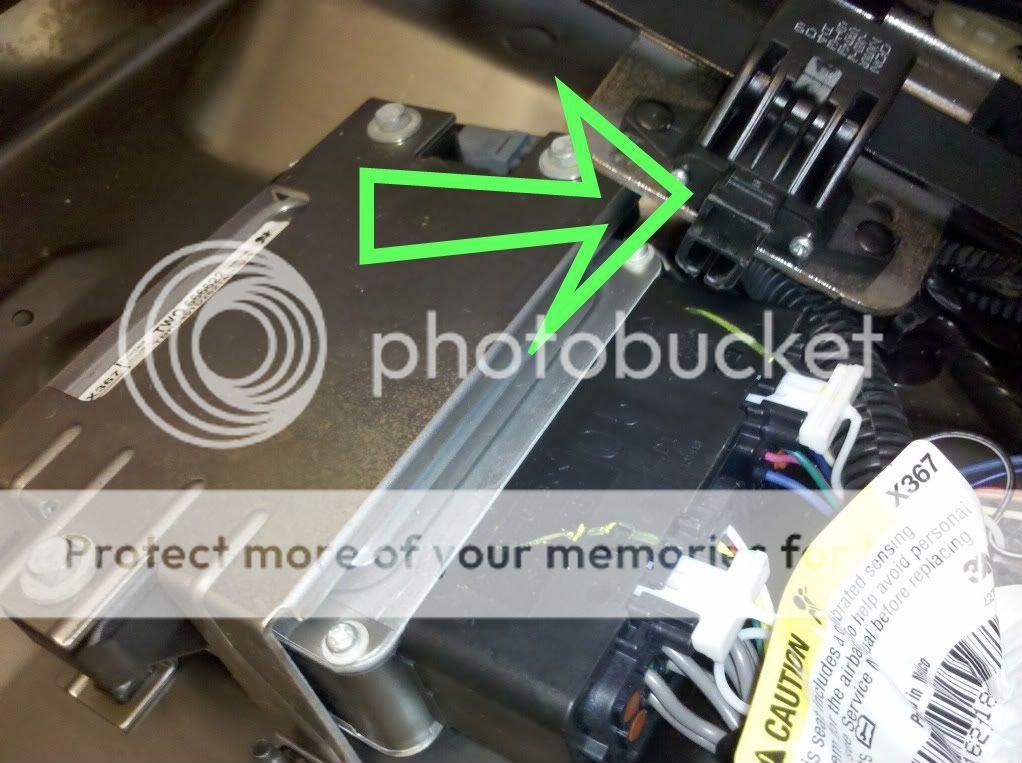
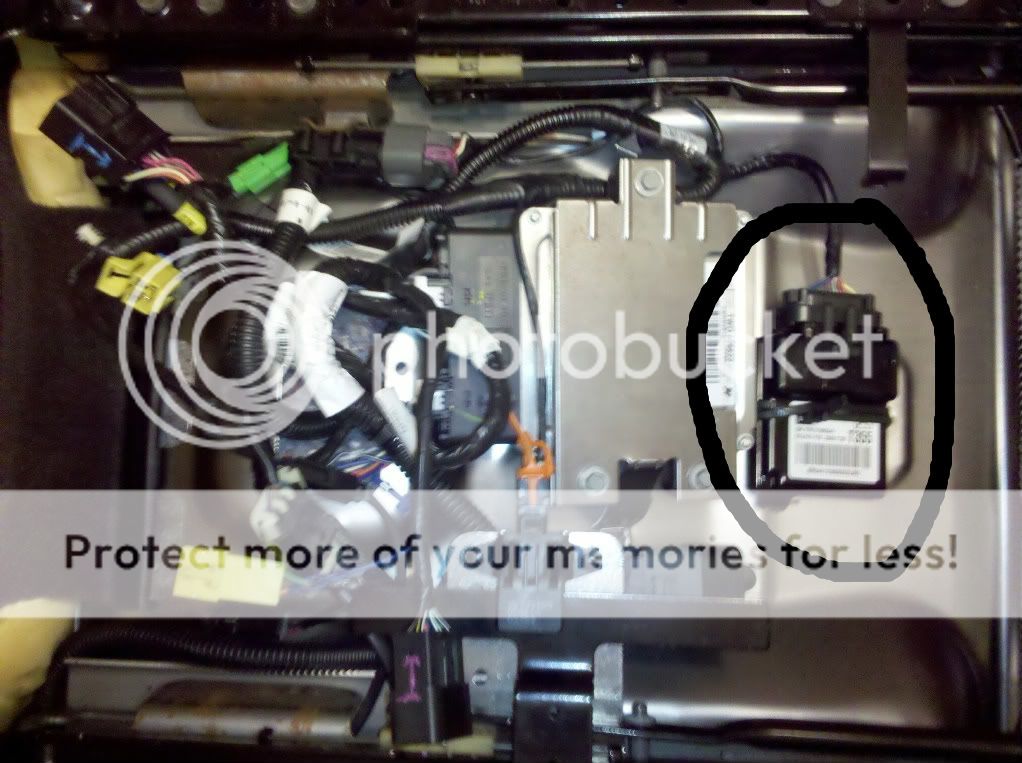
Here you can see all the wires are in place and this box is ziptied in place.
![Image]()
Installed
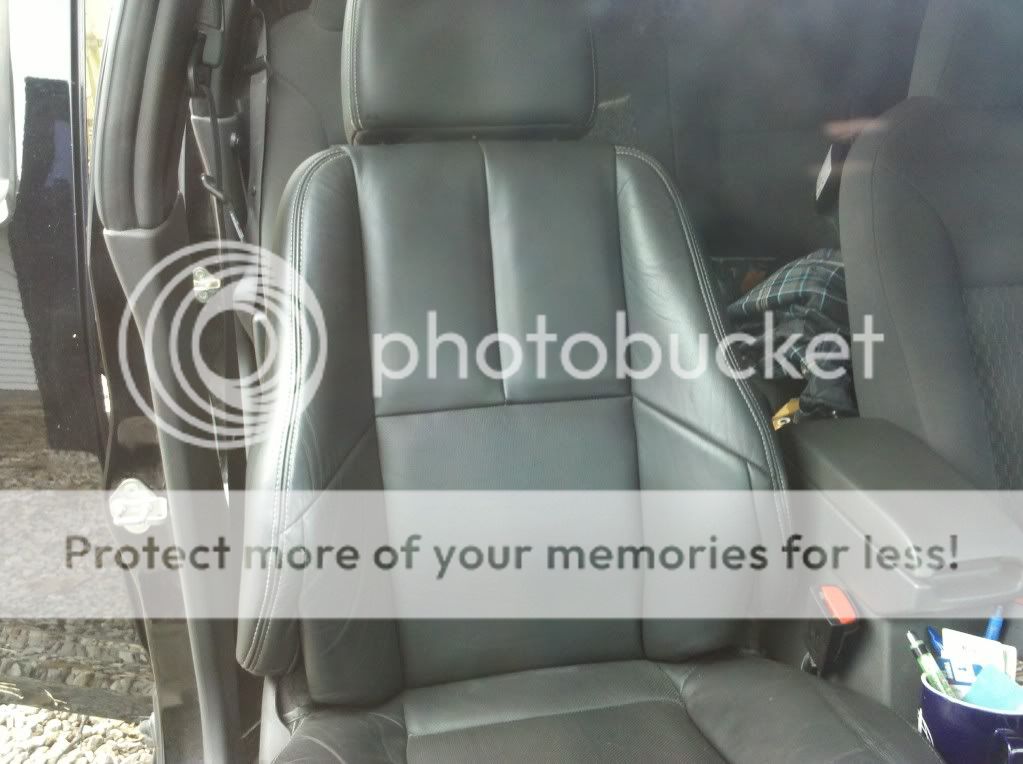
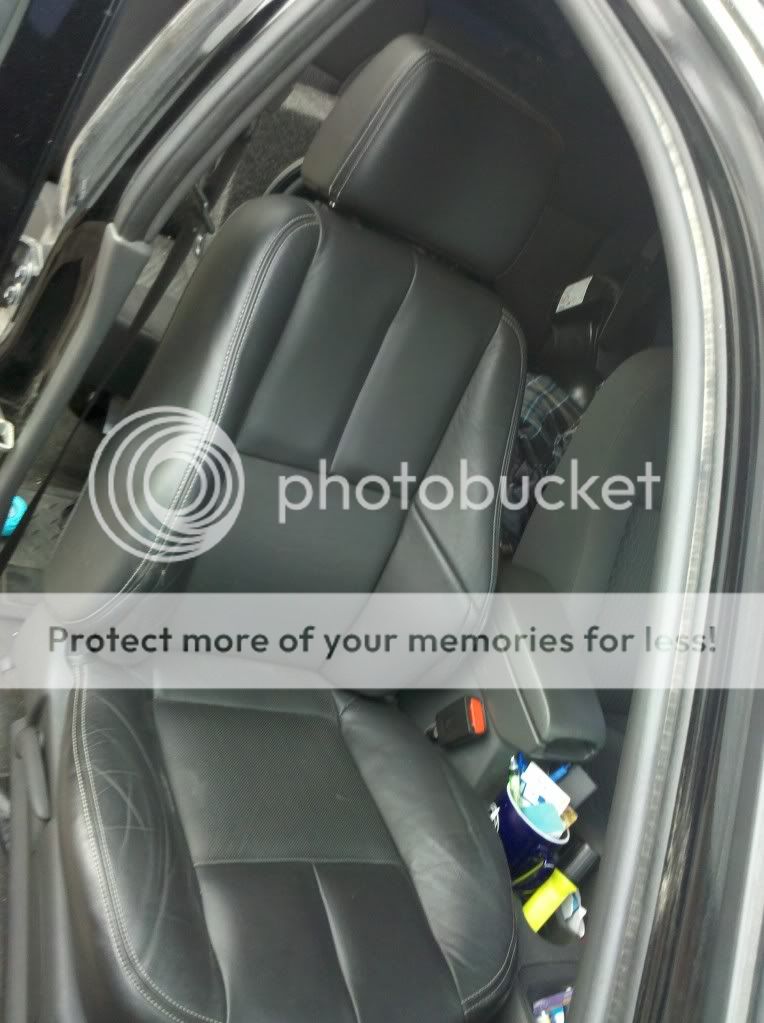
I do not have any of the power functions left but I am going to hook up the heated seats sometime. I hope that this will help you with you install even though it may be a little sketchy, lol. This is my first How-To, thanks and I will be glad to answer any questions you have.
The community here at 355nation.net urges you to please use caution and seek professional assistance when performing modifications to your vehicle. Before attempting any modification it is advised that you refer to your Colorado or Canyon service manual or contact a certified mechanic as not all GMT355 trucks are the same. The staff and the associated members are in no way responsible for any damages, injuries or other harm inflicted to your vehicle or yourself which may result in attempting these modifications. The posts and content presented on this site reflect in no way the views of 355nation.net or it’s ownership.
A 355nation How To presented by
beaver76
Project Name
07 GP seats
Project Description
How-to install 2007 Grand Prix seats into your 355
Skill Level
Moderate
Project Vehicle
Make: Chevrolet
Model: Colorado
Year: 2006
Engine: 3.5L
Power windows: Yes
Sun Roof: No
Tools Needed
Basic sockets, screwdrivers, a drill, something to cut thick ass metal, i used a grinder with a cutoff wheel
Project Time
Depends on how fast you work
Project Cost
That can vary from 0 to 1000 plus effort
First thing to start with on this project is to remove all the current mounting rails from the GP seats. This plate will also need to be removed and the tabs cut off.
The plates will then need to be cut like this to allow room for the seatbelt bracket.

This cut should line up where bottom seat support dip is.
Now you need to remove your seats from the truck. Their will be 4 bolts that hold the seat back to the frame rails. These are 10mm bolts and you will have to acess them by pulling the material back from the frame.
make sure to remove the componets from the passanger side seat for the airbag sensor and place it into the passanger side GP seat. As you can see the 355 rails are going to have to be cut in order for them to mount onto the GP seat.
A cut will need to be made here an all 4 sides. Get as close as you can to the seatbelt mount but dont cut into it.

You dont have to cut off as much as I did either just as long as you clear the seat mount.

now you are ready to start the process of mounting you new seats to the old rails but first measure and make for the holes that will be needed here.
As you will notice their is a control box under the seat that will need to be left there but this causes a problem for the position sencer. I pulled the bolt and drilled a new hole and bent the bracket over and replaced the bolt.
This wil need to be moved over a lil bit to clear.
Here you can see all the wires are in place and this box is ziptied in place.
Installed


I do not have any of the power functions left but I am going to hook up the heated seats sometime. I hope that this will help you with you install even though it may be a little sketchy, lol. This is my first How-To, thanks and I will be glad to answer any questions you have.
 f final product.


