Disclaimer
The community here at 355nation.net urges you to please use caution and seek professional assistance when performing modifications to your vehicle. Before attempting any modification it is advised that you refer to your Colorado or Canyon service manual or contact a certified mechanic as not all GMT355 trucks are the same. The staff and the associated members are in no way responsible for any damages, injuries or other harm inflicted to your vehicle or yourself which may result in attempting these modifications. The posts and content presented on this site reflect in no way the views of 355nation.net or it’s ownership.
![Image]()
A 355nation How To presented by
Gawillet and Popgoesdaweasel16
Project Name
How To: Lift the truck using shackles and Torsion Bars
Project Description
To lift your truck using shackles and the torsion bars. Note: Not all Colorados/Canyons are equipped
with Torsion Bars, only the 2WD and 4WD Z71s and the 4WD Z85s have Torsion Bars suspensions, the 5.3L 2WD Z85 also uses Torsion Bars suspension. The others have
coils.
Skill Level
Moderate
Project Vehicle
Make: Chevy/GMC
Model: Colorado/Canyon
Year: Any
Engine: Any
Power windows: No
Sun Roof: No
Tools Needed
Bricks/Pieces of wood as stops
Floor Jack
Jack Stands
Ratchet/Sockets
1 1/16” Socket (for Torsion Bar adjustment)
3/16 Allen Wrench
Impact Gun (not required, but immensely helpful)
Vise grips or pliers
WD40
Copper anti-seize (to re-grease shocks and shackles)
Project Time
1 hour or less
Project Cost
shackles 120.00
Rancho 5190 shocks 51.00 each optional
Differential spacers, set of 4, contact Larry @ 1-888-MAXX-CAM.Price is scheduled to be $45 + shipping.
Chevy Colorado 2wd MAXX Shackle - Rear (2004-2008) | Chevy | Suspension MAXX | Suspension MAXX
1. Remove the Spare tire with the kit available under the passenger seat. Assemble the kit, crank the rear tire
down and remove it.
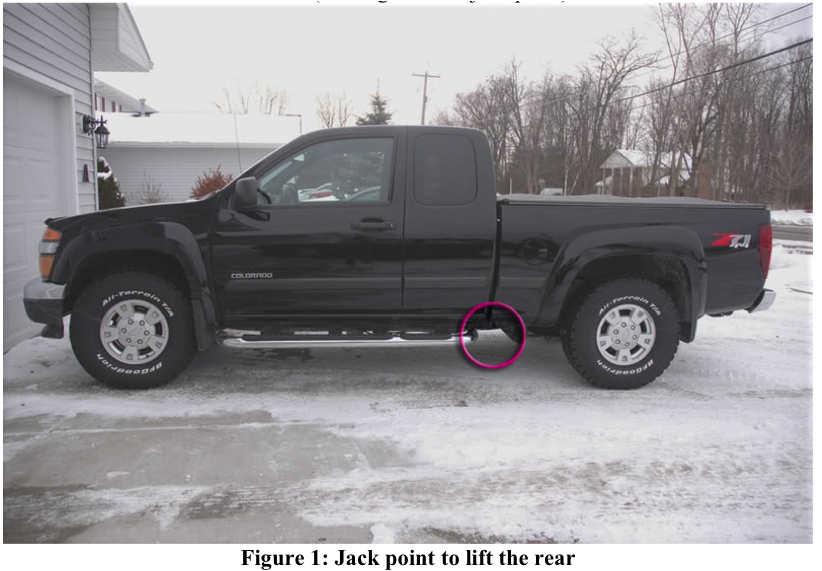
2. Loosen the lugs on the front wheels, jack up the rear of the truck, and place a jack stands under the frame on
each side of the truck and remove the wheels (See Figure 1 for jack point).
![Image]()
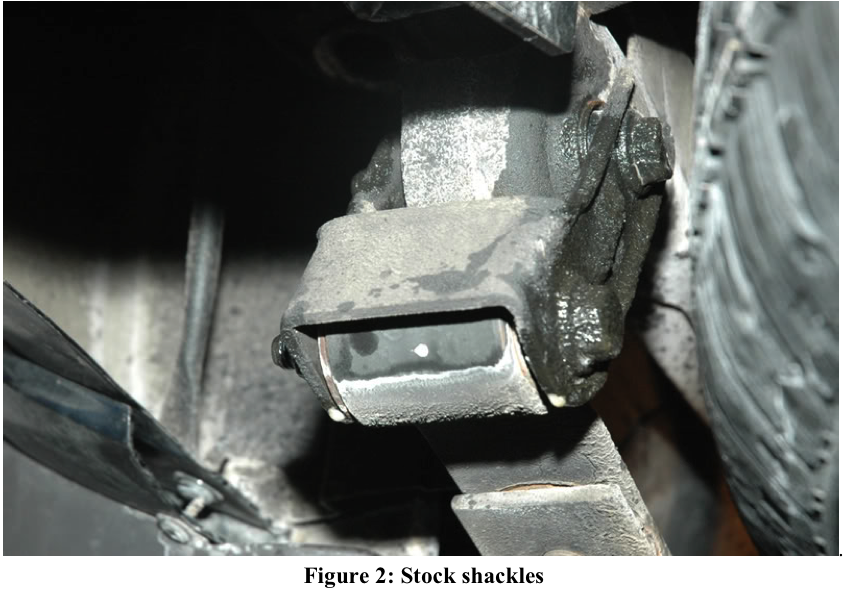
3. Loosen the rear shackle bolts with a 3/4 in wrench and socket.
![Image]()
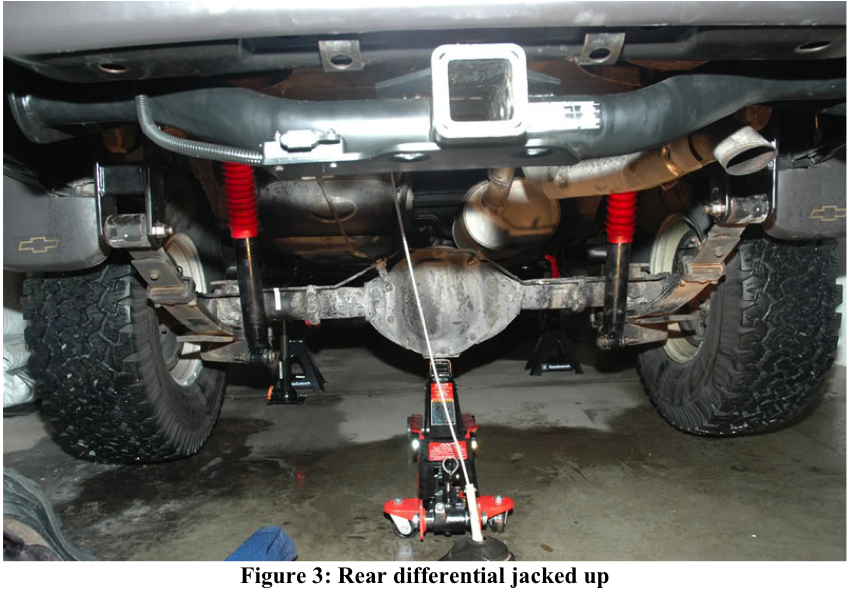
4. Use the Jack to raise the rear differential to take the tension off the springs. You’ll know when you’ve raised
it enough because the shackle will become loose.
![Image]()
5. You should now be able to remove 3 of the 4 bolts from the shackles. Use a hammer to knock the bolts out.
I used my 10” socket extension to help remove the bolts from the holes. You will need to lower the rear
differential some to allow for the bottom right shackle bolt to clear the exhaust pipe and allow you to remove
the final shackle bolt.
6. Remove the bottom bolts from the rear shocks using a 3/4” wrench and socket (Save these bolts and nuts, you
will need them to install the new shocks).
7. Remove the top bolts of the shocks (2 bolts per shock) using a 1/2” socket and the 10” socket extension. The
shock will just fall off so watch yourself (Save the bolts to be reused when installing new shocks).
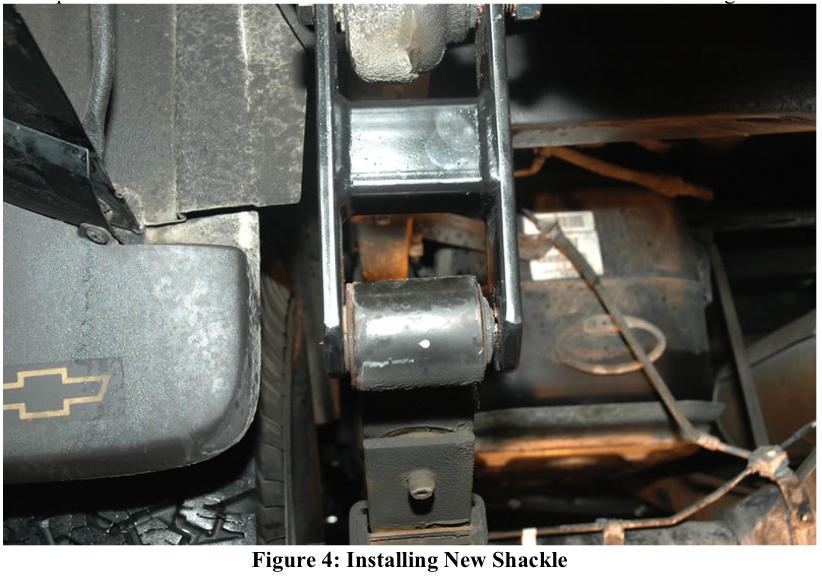
8. Now we are ready to install the new shackles. Grease the holes of the shackle with some anti-seize. Insert the
top bolt and hand tighten the nut. After you’ve got the top bolts in each shackle in, adjust the jack up or down so
the springs line up with the bottom holes of the shackle. Insert the bottom bolts and hand tighten
![Image]()
9. Install the rear shocks using the bolts you used from the stock shocks with a 3/4” wrench and socket for the
bottom bolt and 1/2” socket and 10” extension for the top bolts. I used Rancho 5190 shocks. Use anti-seize in
the bottom shock bolt hole.
![Image]()
10. Reinstall the spare tire.
11. Lower the jack holding the rear diff off the ground.
12. Tighten all the shackle bolts.
13. Jack up each side of the truck in front of the rear leaf springs one at a time and remove the jack stands. Now
you’re done with the rear end!
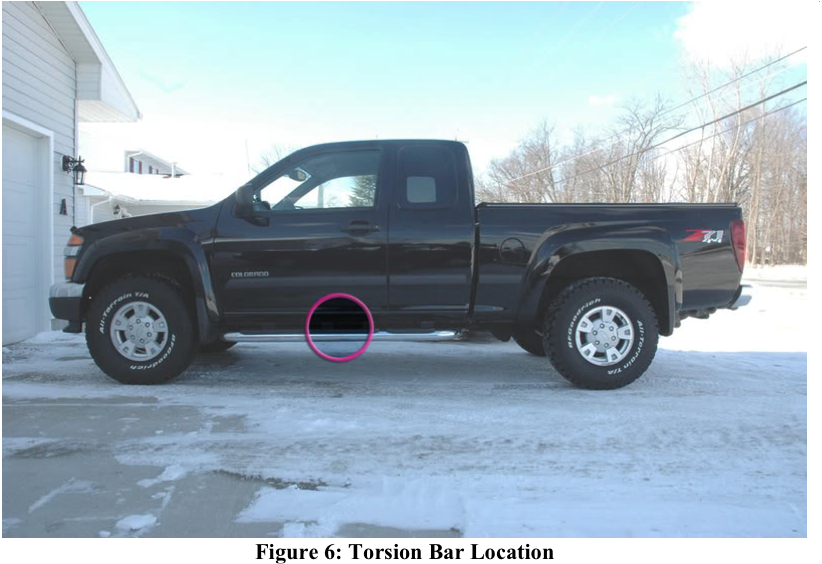
14. Raise the front of the truck until the front wheels are off the ground. Place jack stands under the frame and
lower the jack. The Torsion Bar is located under the truck half way down the front doors (see Figure 6).
![Image]()
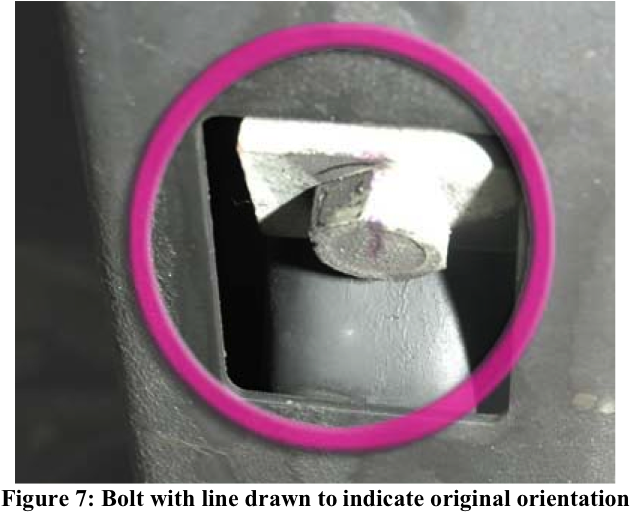
15. Use a marker to draw a straight line running from the center of the bolt to the frame so you know when
you’ve made one complete rotation (see Figure 7).
![Image]()
16. Use a 1-1/16” socket to turn the bolt clock wise (right) to raise the front end of the truck. I started by doing 5
complete turns on both sides. Lower the truck back down to see if the height is where you want it and measure
to make sure each side is equal. After the original turns, I was easily able to turn the bolts with the truck on the
ground. I proceeded to turn the passenger side 1 more turn and the driver side 1-1/4 more turn to get both sides
equal and the height where I wanted.
17. Support your diff and remove all four bolts. Next lower the diff about an inch, slide in the spacers and reuse the factory bolts. This serves to correct the new CV shaft angle and lowers the diff which lessens the halfshaft angles,otherwise you will damage the CV boots.
![Image]()
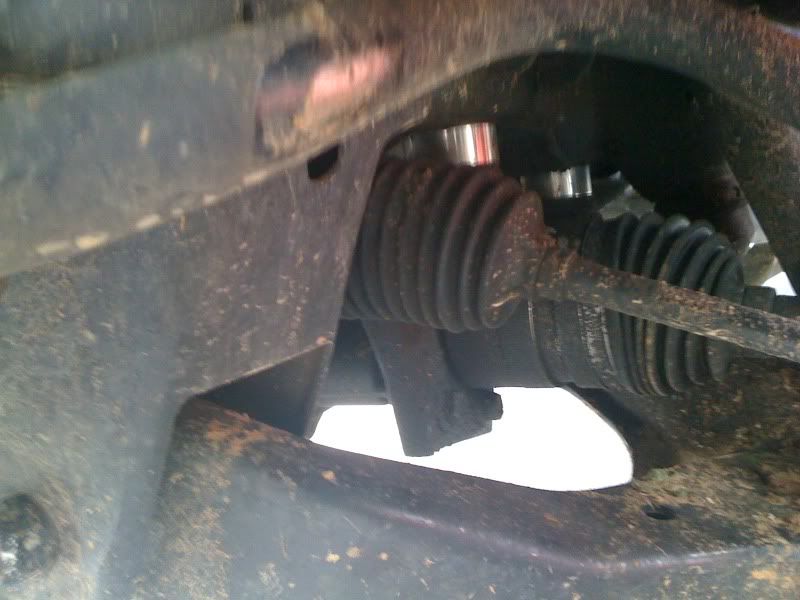
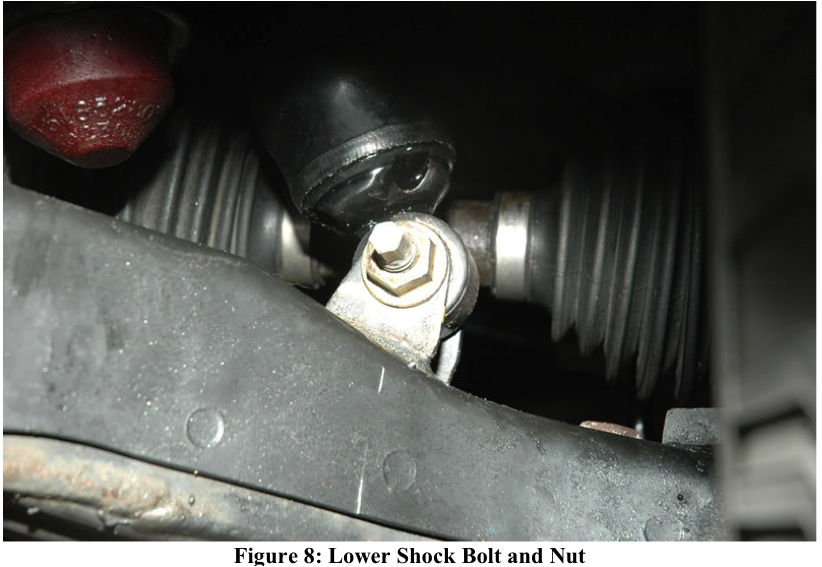
18. Now, we’ll install the new front shocks. You don’t need to lift the truck up to replace the front shocks but it
does make things much easier. Remove the bottom bolt from the shock using a 3/4” socket and wrench. Save
this nut and bolt for when you install the new shock.
![Image]()
19. Remove the top nut using a 5/8” wrench and 3/16” Allen wrench. The Allen wrench fits into the top of the
shock bolt. The shock will fall out onto the ground. You don’t need to keep any parts from the top of the shock;
you will NOT be reusing them.
![Image]()
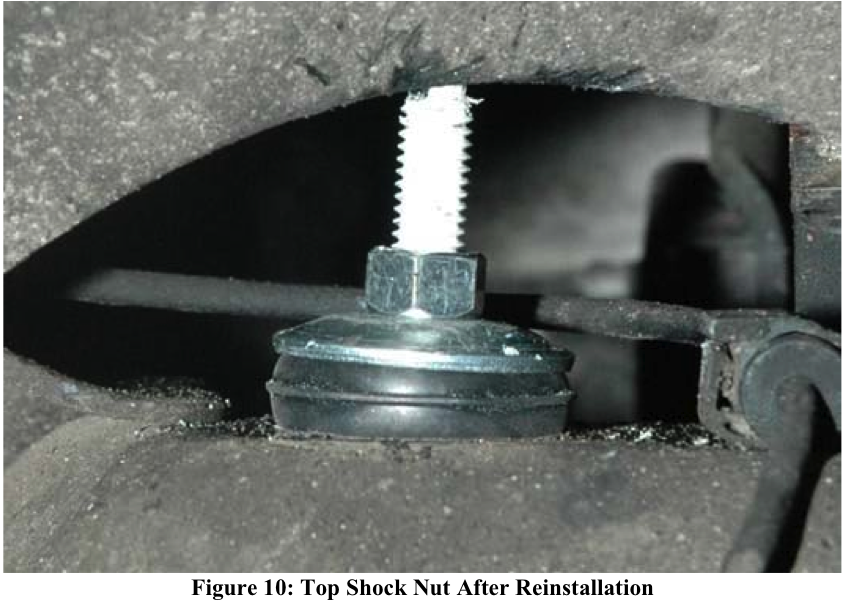
20. Install the new shock. Grease the lower bolt hole, and install the lower end of the shock into the mounting
location, reusing the stock bolt and nut. Install the top nut using a 1/2” wrench and the supplied hardware that
came with your new shocks. Install the rubber bushings and metal plates the same way they came off. Use vise
grips/pliers to hold the top of the bolt to keep it from spinning and tighten down the nut as much as you can.
![Image]()
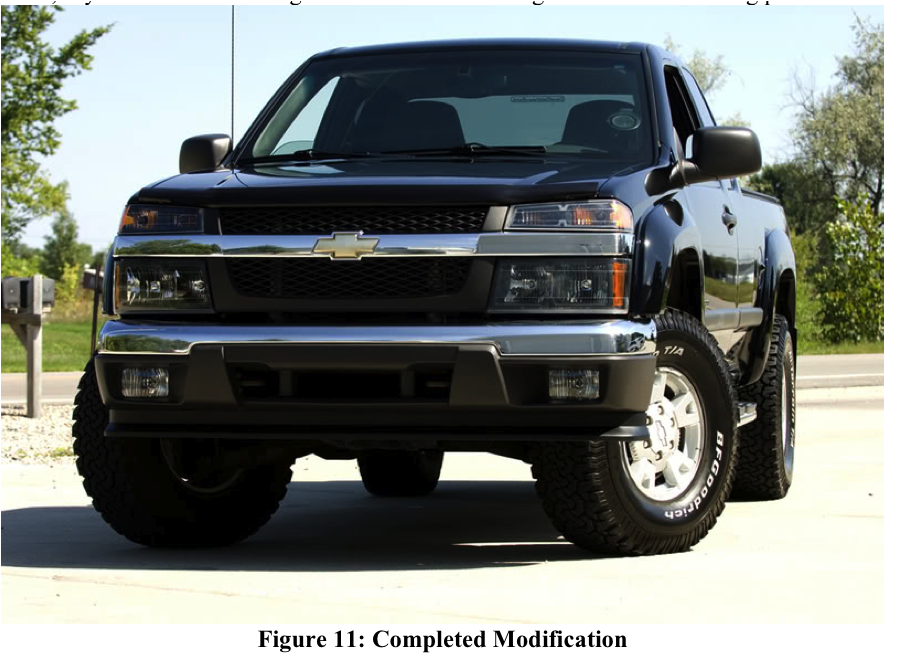
21. You’re done, now get a front end alignment and you should be fine.
![Image]()
The community here at 355nation.net urges you to please use caution and seek professional assistance when performing modifications to your vehicle. Before attempting any modification it is advised that you refer to your Colorado or Canyon service manual or contact a certified mechanic as not all GMT355 trucks are the same. The staff and the associated members are in no way responsible for any damages, injuries or other harm inflicted to your vehicle or yourself which may result in attempting these modifications. The posts and content presented on this site reflect in no way the views of 355nation.net or it’s ownership.
A 355nation How To presented by
Gawillet and Popgoesdaweasel16
Project Name
How To: Lift the truck using shackles and Torsion Bars
Project Description
To lift your truck using shackles and the torsion bars. Note: Not all Colorados/Canyons are equipped
with Torsion Bars, only the 2WD and 4WD Z71s and the 4WD Z85s have Torsion Bars suspensions, the 5.3L 2WD Z85 also uses Torsion Bars suspension. The others have
coils.
Skill Level
Moderate
Project Vehicle
Make: Chevy/GMC
Model: Colorado/Canyon
Year: Any
Engine: Any
Power windows: No
Sun Roof: No
Tools Needed
Bricks/Pieces of wood as stops
Floor Jack
Jack Stands
Ratchet/Sockets
1 1/16” Socket (for Torsion Bar adjustment)
3/16 Allen Wrench
Impact Gun (not required, but immensely helpful)
Vise grips or pliers
WD40
Copper anti-seize (to re-grease shocks and shackles)
Project Time
1 hour or less
Project Cost
shackles 120.00
Rancho 5190 shocks 51.00 each optional
Differential spacers, set of 4, contact Larry @ 1-888-MAXX-CAM.Price is scheduled to be $45 + shipping.
Chevy Colorado 2wd MAXX Shackle - Rear (2004-2008) | Chevy | Suspension MAXX | Suspension MAXX
1. Remove the Spare tire with the kit available under the passenger seat. Assemble the kit, crank the rear tire
down and remove it.
2. Loosen the lugs on the front wheels, jack up the rear of the truck, and place a jack stands under the frame on
each side of the truck and remove the wheels (See Figure 1 for jack point).
3. Loosen the rear shackle bolts with a 3/4 in wrench and socket.
4. Use the Jack to raise the rear differential to take the tension off the springs. You’ll know when you’ve raised
it enough because the shackle will become loose.
5. You should now be able to remove 3 of the 4 bolts from the shackles. Use a hammer to knock the bolts out.
I used my 10” socket extension to help remove the bolts from the holes. You will need to lower the rear
differential some to allow for the bottom right shackle bolt to clear the exhaust pipe and allow you to remove
the final shackle bolt.
6. Remove the bottom bolts from the rear shocks using a 3/4” wrench and socket (Save these bolts and nuts, you
will need them to install the new shocks).
7. Remove the top bolts of the shocks (2 bolts per shock) using a 1/2” socket and the 10” socket extension. The
shock will just fall off so watch yourself (Save the bolts to be reused when installing new shocks).
8. Now we are ready to install the new shackles. Grease the holes of the shackle with some anti-seize. Insert the
top bolt and hand tighten the nut. After you’ve got the top bolts in each shackle in, adjust the jack up or down so
the springs line up with the bottom holes of the shackle. Insert the bottom bolts and hand tighten
9. Install the rear shocks using the bolts you used from the stock shocks with a 3/4” wrench and socket for the
bottom bolt and 1/2” socket and 10” extension for the top bolts. I used Rancho 5190 shocks. Use anti-seize in
the bottom shock bolt hole.

10. Reinstall the spare tire.
11. Lower the jack holding the rear diff off the ground.
12. Tighten all the shackle bolts.
13. Jack up each side of the truck in front of the rear leaf springs one at a time and remove the jack stands. Now
you’re done with the rear end!
14. Raise the front of the truck until the front wheels are off the ground. Place jack stands under the frame and
lower the jack. The Torsion Bar is located under the truck half way down the front doors (see Figure 6).
15. Use a marker to draw a straight line running from the center of the bolt to the frame so you know when
you’ve made one complete rotation (see Figure 7).
16. Use a 1-1/16” socket to turn the bolt clock wise (right) to raise the front end of the truck. I started by doing 5
complete turns on both sides. Lower the truck back down to see if the height is where you want it and measure
to make sure each side is equal. After the original turns, I was easily able to turn the bolts with the truck on the
ground. I proceeded to turn the passenger side 1 more turn and the driver side 1-1/4 more turn to get both sides
equal and the height where I wanted.
17. Support your diff and remove all four bolts. Next lower the diff about an inch, slide in the spacers and reuse the factory bolts. This serves to correct the new CV shaft angle and lowers the diff which lessens the halfshaft angles,otherwise you will damage the CV boots.
18. Now, we’ll install the new front shocks. You don’t need to lift the truck up to replace the front shocks but it
does make things much easier. Remove the bottom bolt from the shock using a 3/4” socket and wrench. Save
this nut and bolt for when you install the new shock.
19. Remove the top nut using a 5/8” wrench and 3/16” Allen wrench. The Allen wrench fits into the top of the
shock bolt. The shock will fall out onto the ground. You don’t need to keep any parts from the top of the shock;
you will NOT be reusing them.

20. Install the new shock. Grease the lower bolt hole, and install the lower end of the shock into the mounting
location, reusing the stock bolt and nut. Install the top nut using a 1/2” wrench and the supplied hardware that
came with your new shocks. Install the rubber bushings and metal plates the same way they came off. Use vise
grips/pliers to hold the top of the bolt to keep it from spinning and tighten down the nut as much as you can.
21. You’re done, now get a front end alignment and you should be fine.