

Disclaimer
The community here at 355nation.net urges you to please use caution and seek professional assistance when performing modifications to your vehicle. Before attempting any modification it is advised that you refer to your Colorado or Canyon service manual or contact a certified mechanic as not all GMT355 trucks are the same. The staff and the associated members are in no way responsible for any damages, injuries or other harm inflicted to your vehicle or yourself which may result in attempting these modifications. The posts and content presented on this site reflect in no way the views of 355nation.net or it’s ownership.
![Image]()
A 355nation How To presented by
06Stinger (Wayne)
Project Name
Door Panel Mod Update
Project Description
In this How to, you will learn to to remove, dis/reassemble and replace interior front door panels.
Skill Level
Moderate
Project Vehicle
Make: Chevrolet
Model: Colorado
Year: 2006
Engine: 3.5L
Power Windows: No
Sun Roof: No
Tools Needed
Project Time
2-4 Hours
Project Cost
Dis/Re Assemble Door Panel. $2.00 or less
Add Paint: $8.00
Add Upholstered Panel. (Professional):$40.00
NOTICE: In this how to I'm removing and disassembling the drivers side door panel. (Armrest panel to trim shop) I'm assembling and reattaching the passenger side door panel. (Armrest panel back from trim shop) The process is exactly the same for both driver and passenger side.
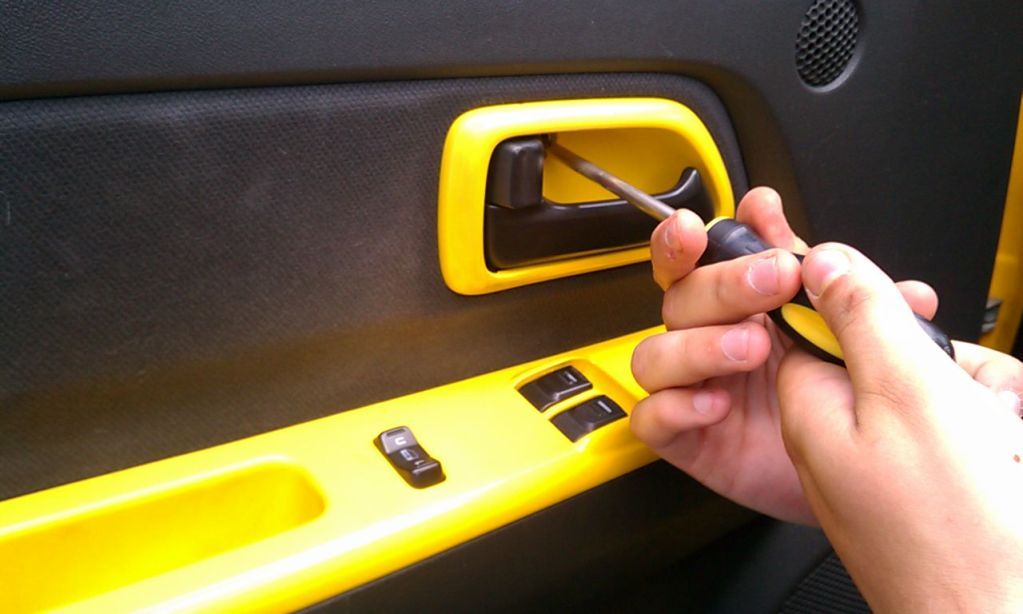
Remove Door handle trim
![Image]()
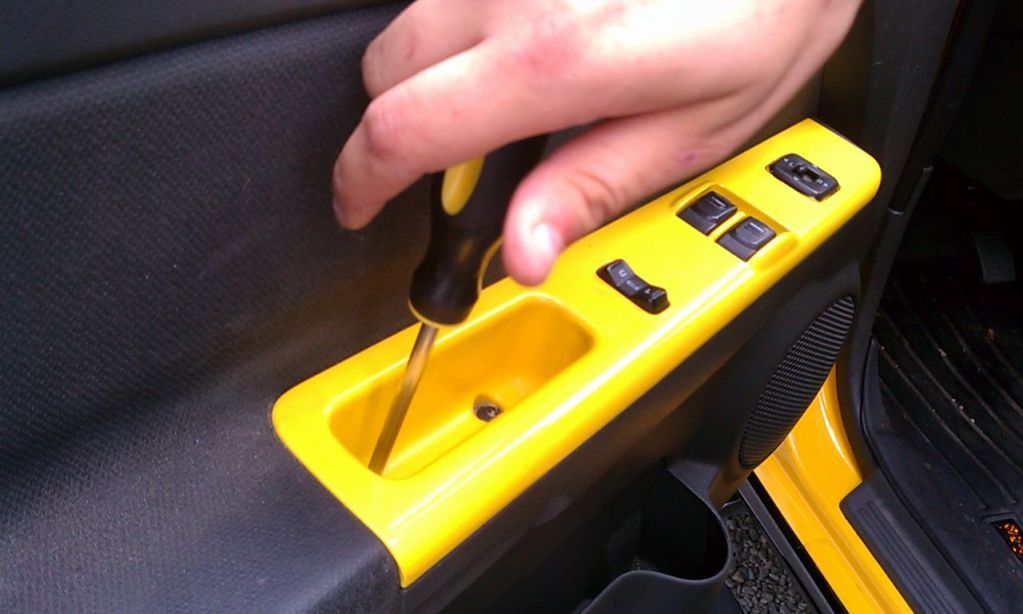
Remove armrest control panel. (Pry from the front to avoid braking the clip)
![Image]()
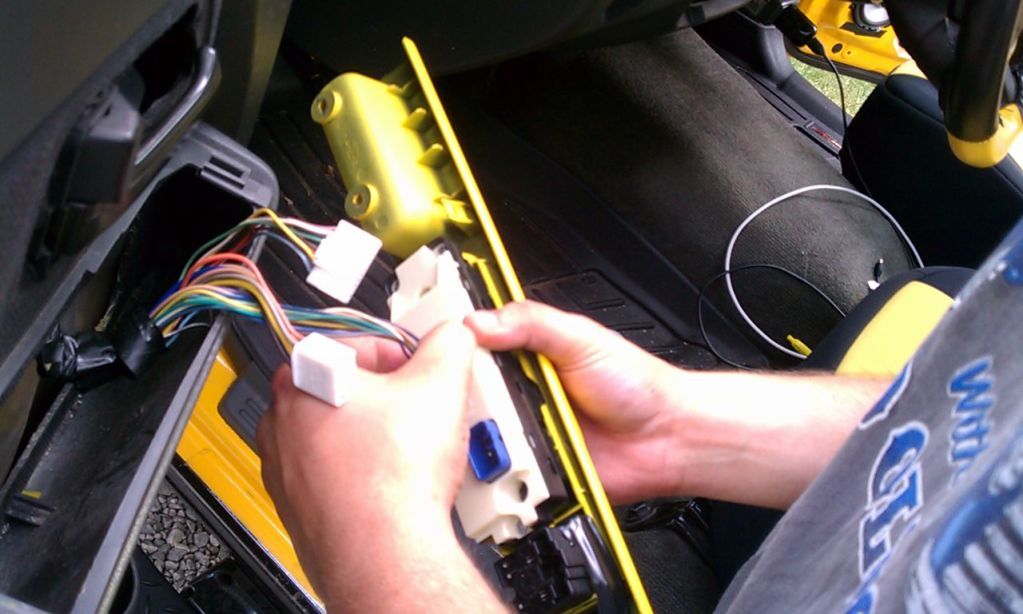
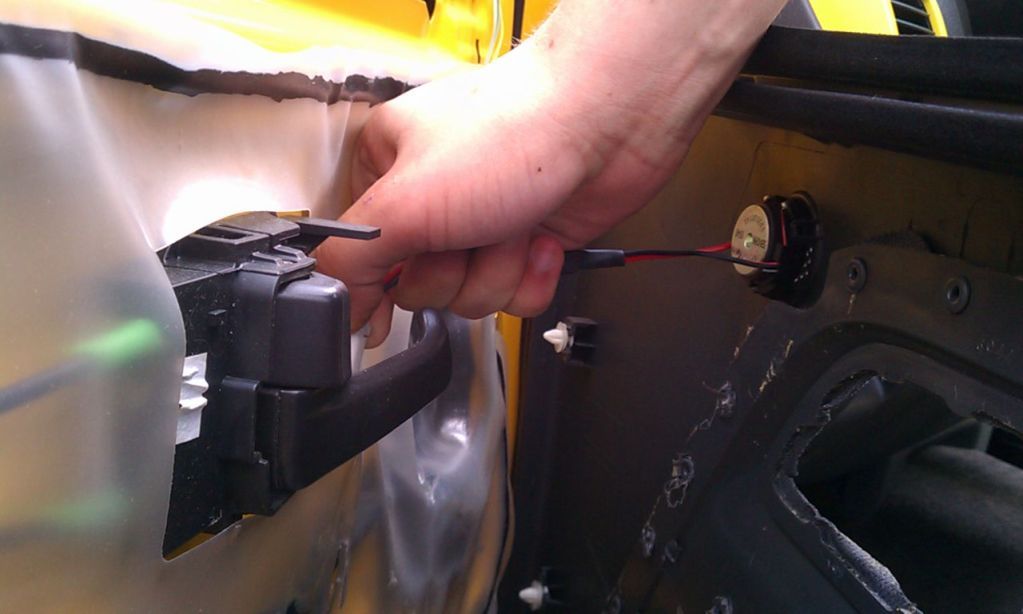
Disconnect wiring harness.
![Image]()
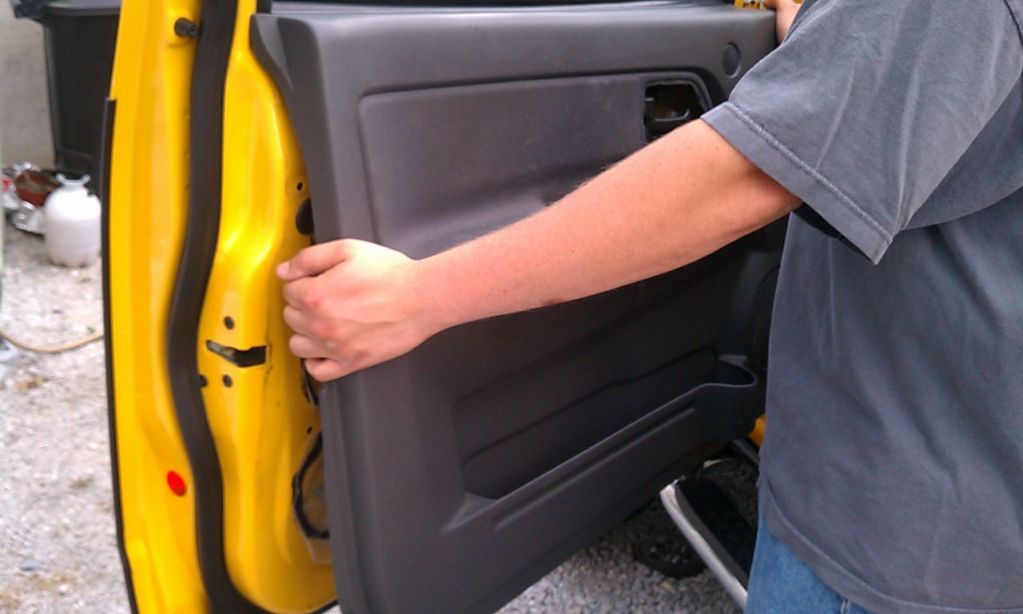
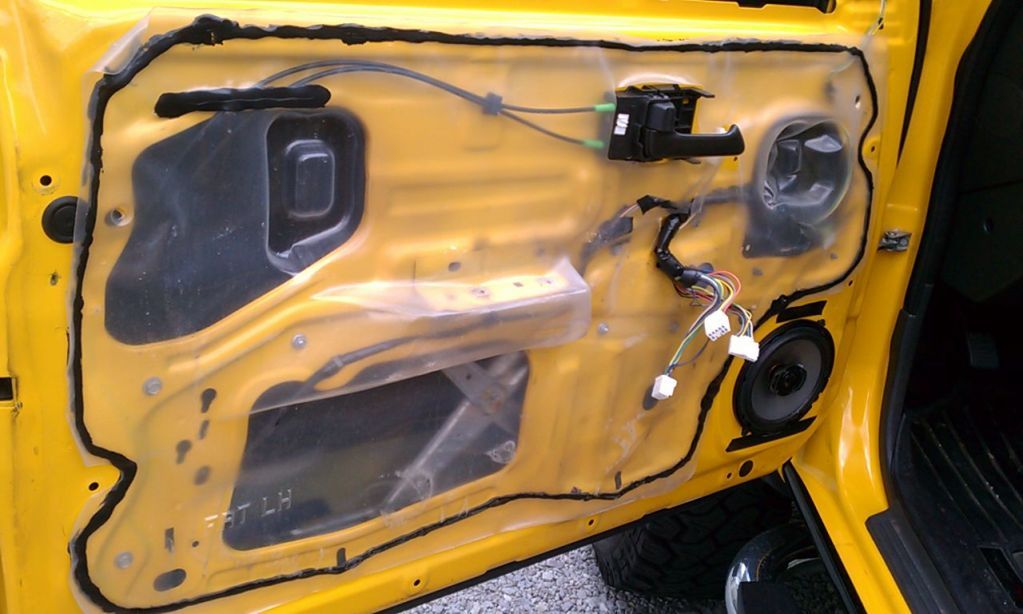
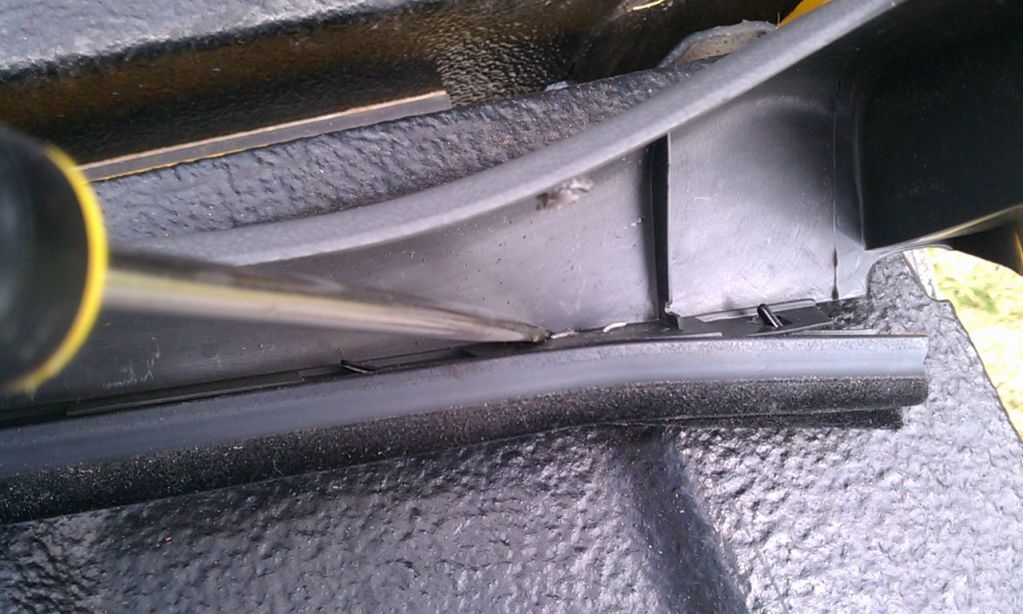
Release door panel from clips....starting from the lower front. Lift the Panel up to release the weather stripping from the door itself. DO NOT PULL PANEL AWAY!!! TWEETER WIRE IS CONNECTED!!!
![Image]()
Carefully disconnect the tweeter wire. (Have someone hold the panel.)
![Image]()
![Image]()
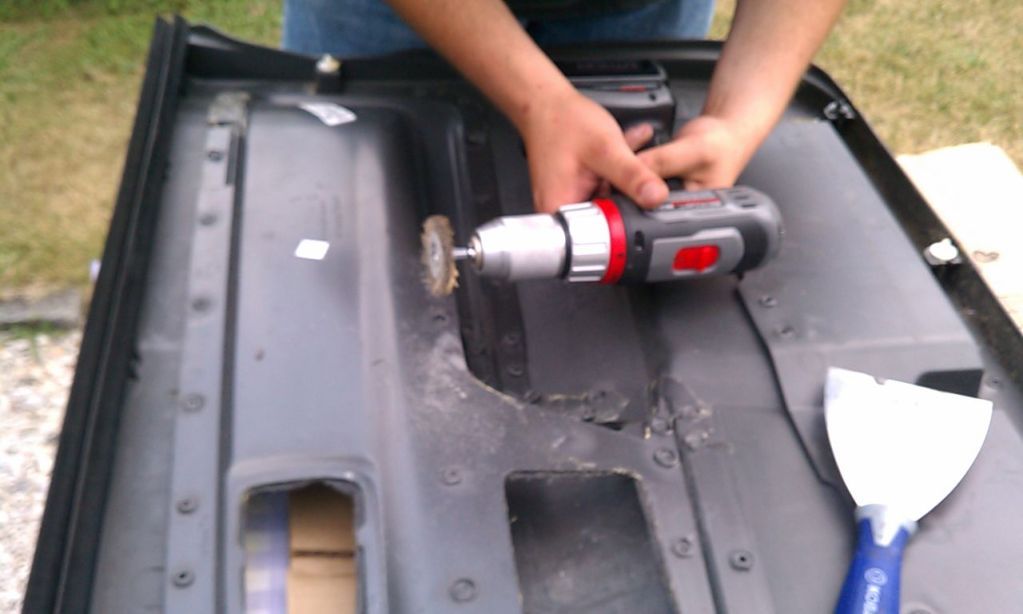
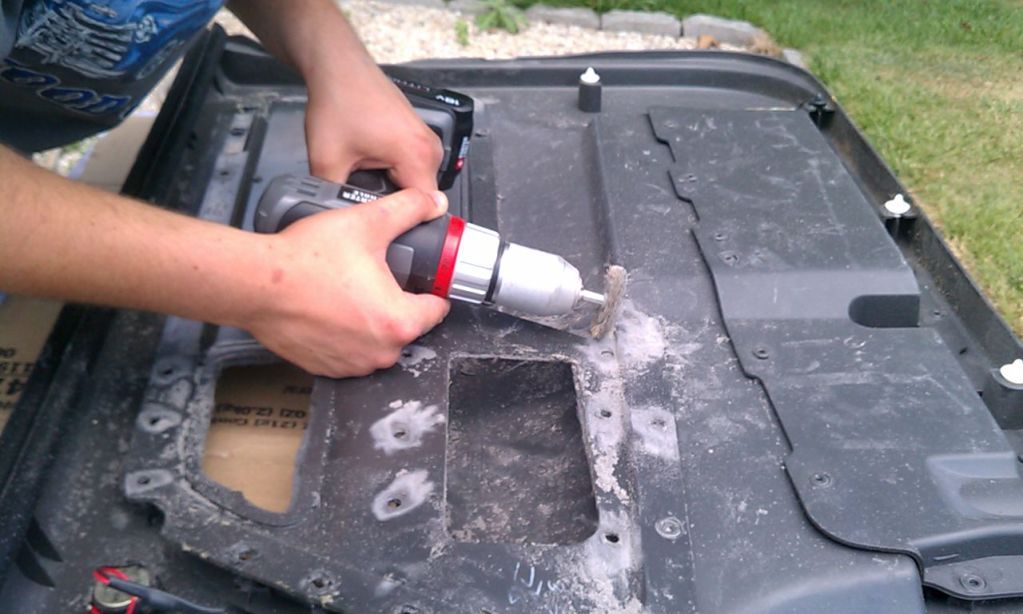
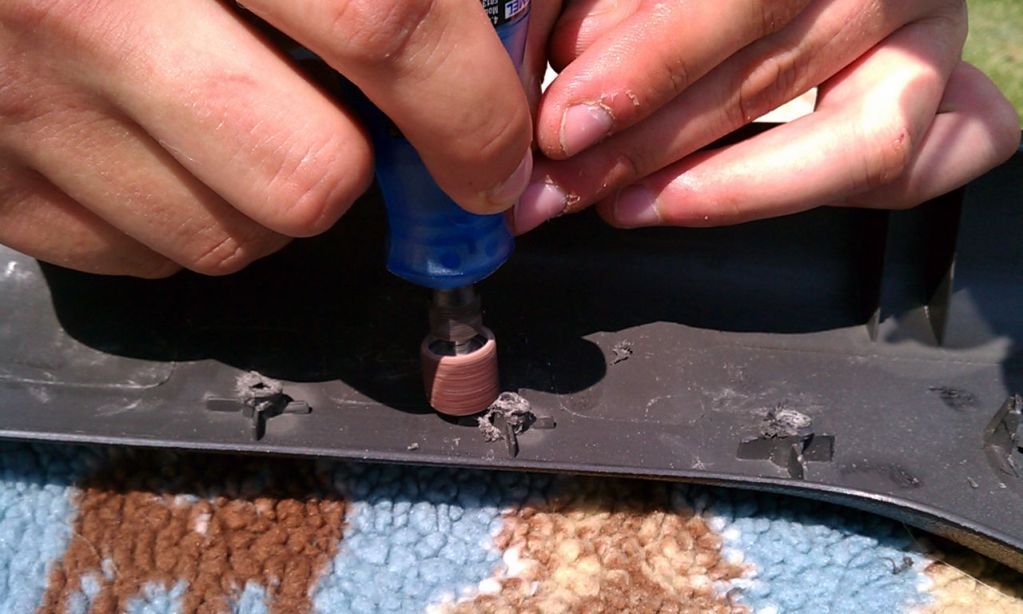
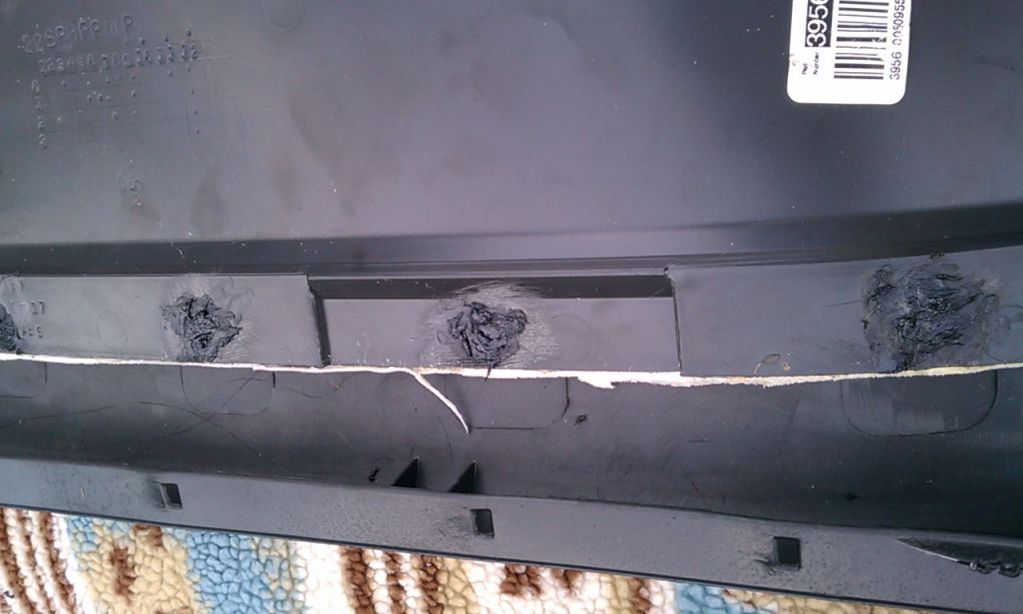
Carefully grind down plastic welds to release each "rivet" (plastic). I used a 2 1/2" wire wheel. Use the putty knife to help separate the panels.
![Image]()
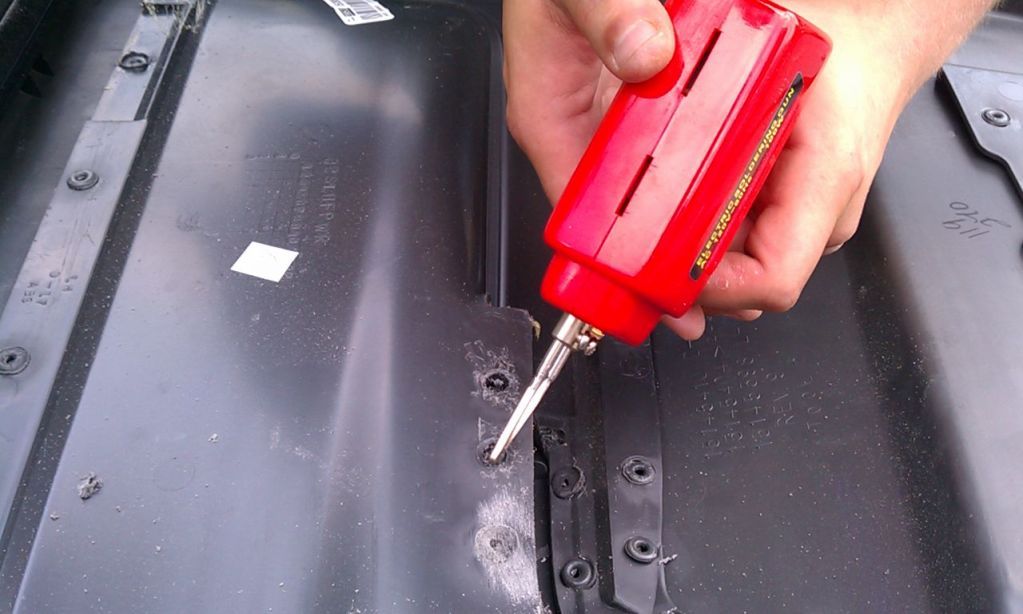
You can use a soldering iron and melt each plastic rivet. (Grinding is faster and there are alot of rivets. Careful to inspect panel to make sure you only grind the ones you need in order to separate the panels)
![Image]()
More Grinding!!!
![Image]()
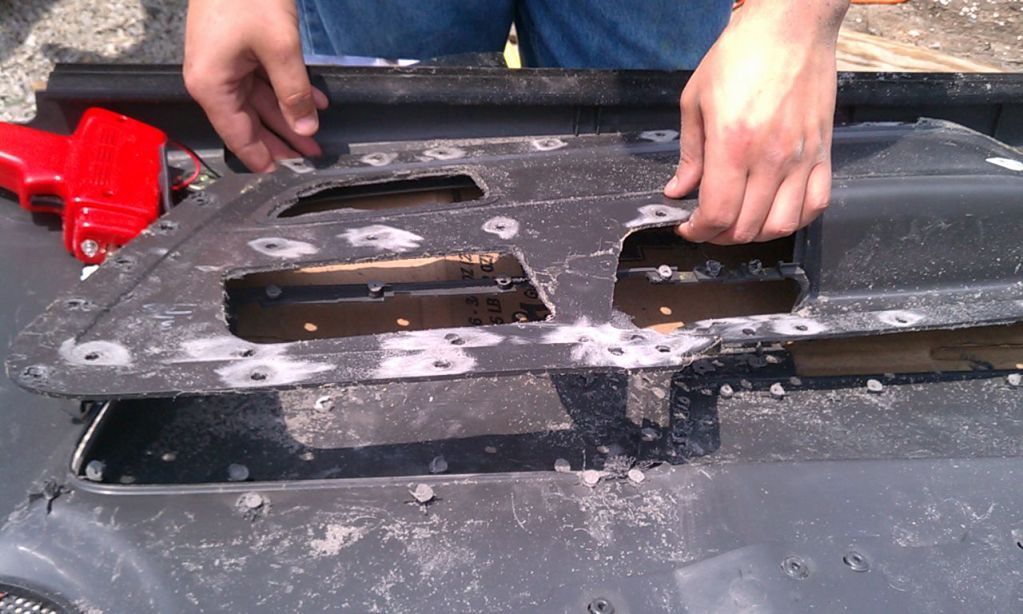
It's Free!
![Image]()
![Image]()
![Image]()
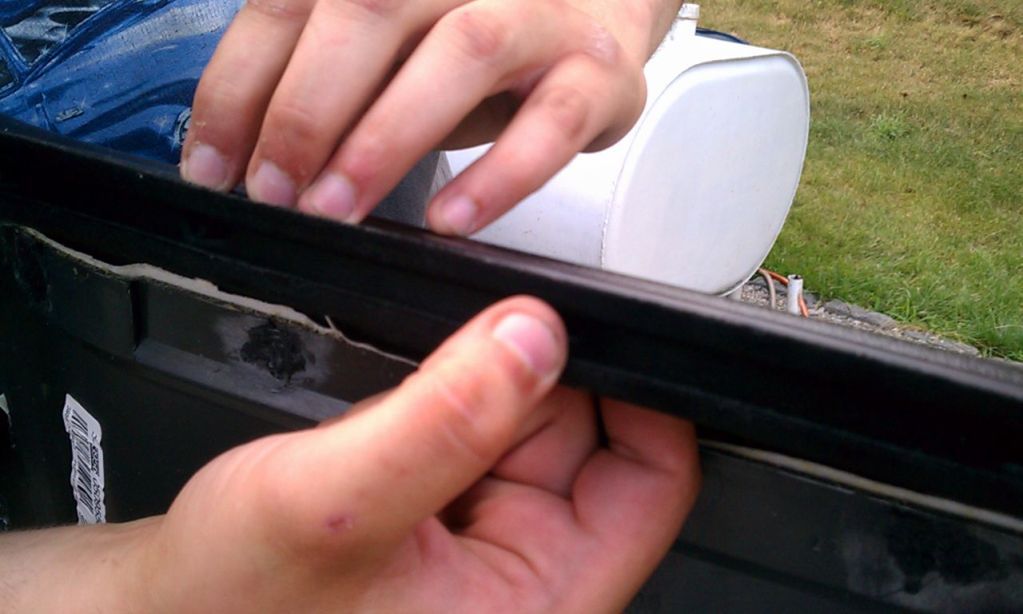
Remove Weatherstripping by locating metal "staples" at either end of door panel. I took this off for paint. Skip this if you're not going to paint.
![Image]()
Pull staples with needle nose pliers.
![Image]()
Straighten remaining metal tabs that are holding strip on and carefully pull upward.
![Image]()
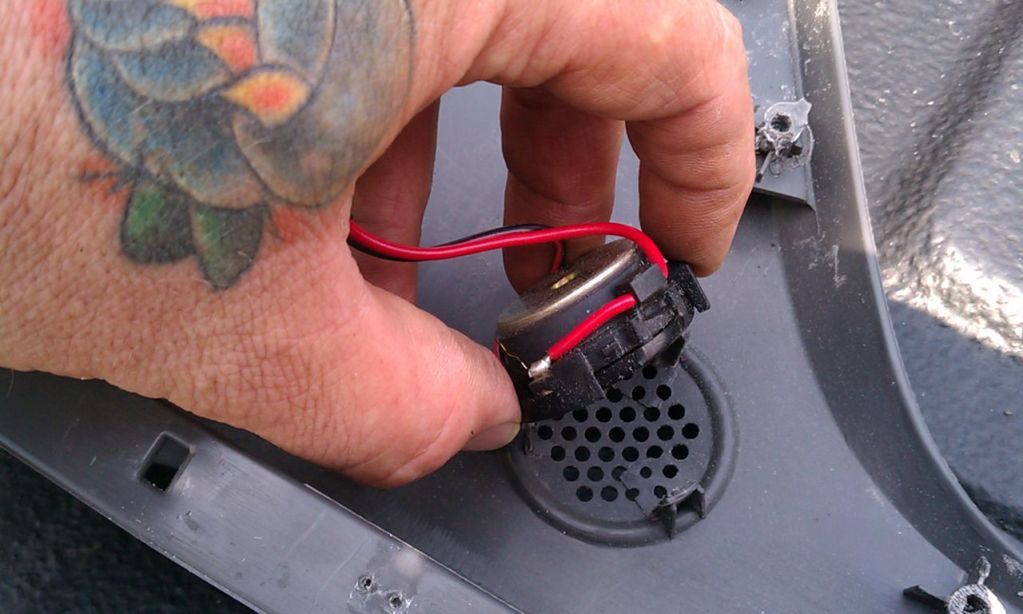
Remove tweeter by using a small screwdriver to release tabs. (Skip this if you are not painting)
![Image]()
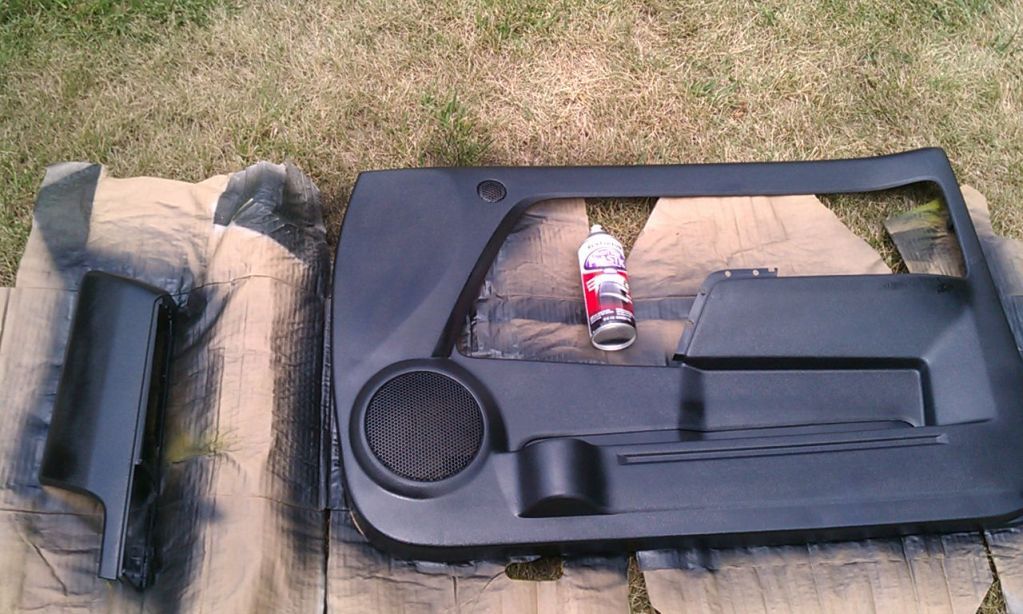
Lightly Scuff Panel With Fine Sandpaper. Don't forget to wipe it down when finished. (Microfiber works great)
![Image]()
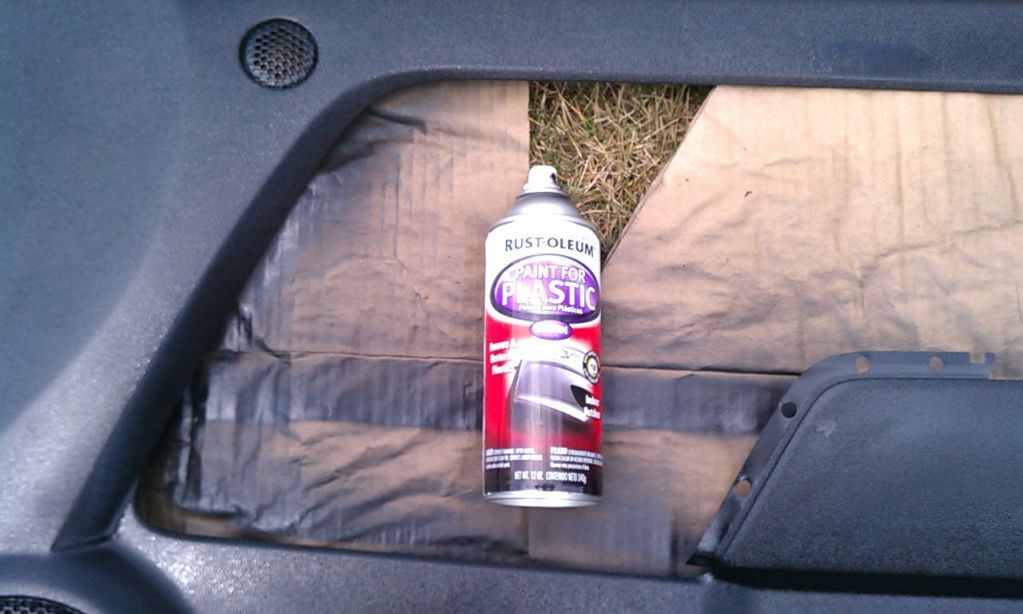
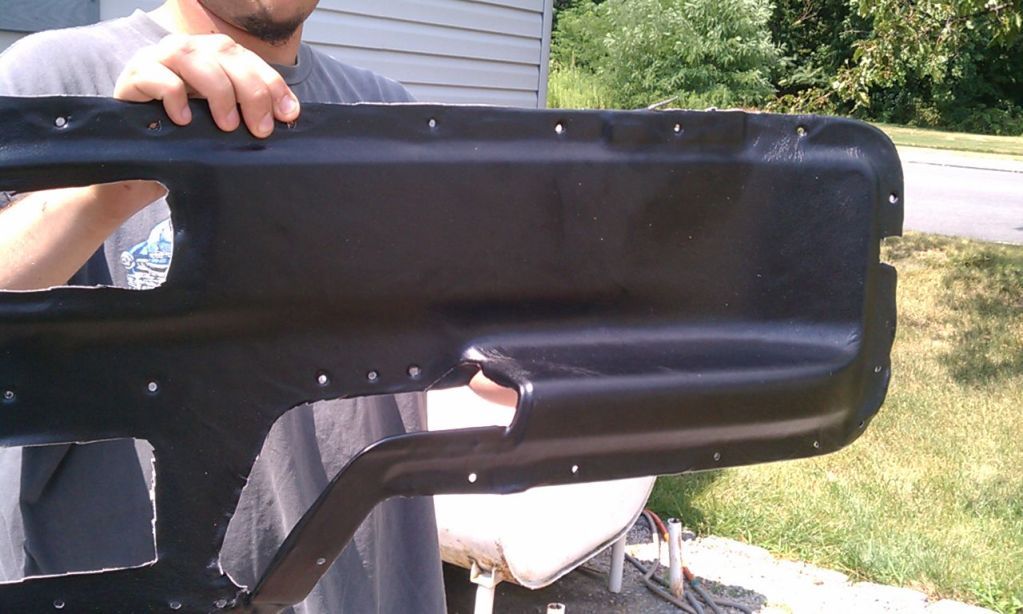
For my mod, I used Rustoleum's plastic paint....Black Satin to be exact.
![Image]()
I baked it in the sun for one hour. (Just enough time to go get another soldering gun)
![Image]()
I had my panel upholstered by a professional. It cost me $40.00. Consult your local trim shop for pricing.
![Image]()
Prep the nubs to receive the newly reupholstered panels. NOTE: you may have to redrill the holes in the "NEW" panel to accept the nubs....use a brand new drill bit to keep from pulling the fabric.
![Image]()
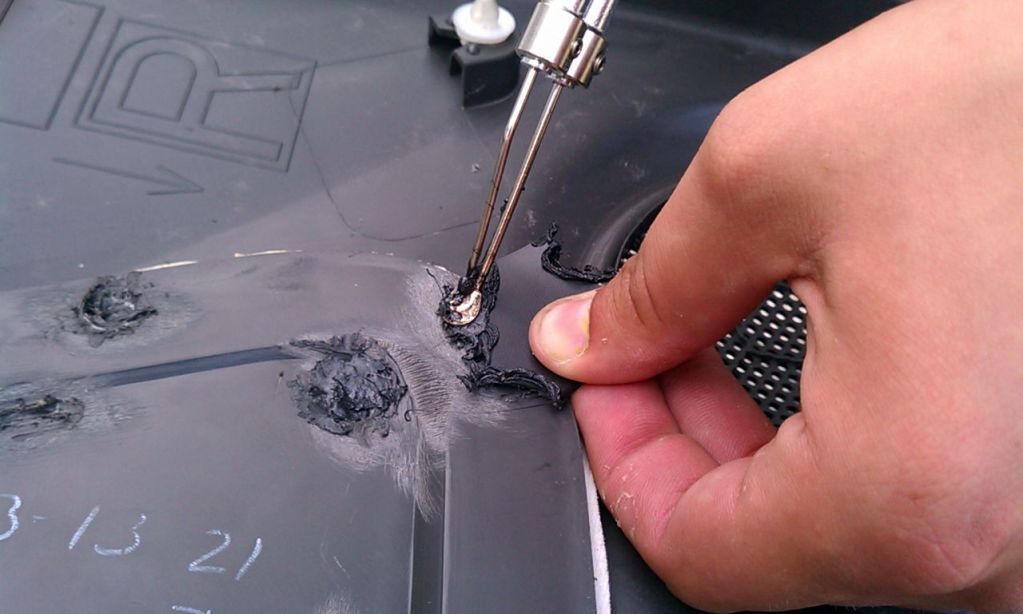
Use soldering iron to melt the plastic rivets back together. NOTE: Some of the rivets may be shallow from over grinding. I bought a $1.99 cup holder and cut it into pieces in order to add more plastic for the plastic welds.
![Image]()
Rivets.....finished.
![Image]()
Reattach window weather stripping. I omitted the metal staples in the reassembly process. (DON'T FORGET THE TWITTER, IT SIMPLY POPS BACK IN PLACE)
![Image]()
I added some vinyl trim I hand handy to make it "pop" a bit.
![Image]()
Reattach the panel in reverse order. Start by reattaching the twitter wires. "Hang" the panel in the door before refastening the clips. Reconnect the wiring harnesses , reattach armrest control panel and door handle trim with screws.
![Image]()
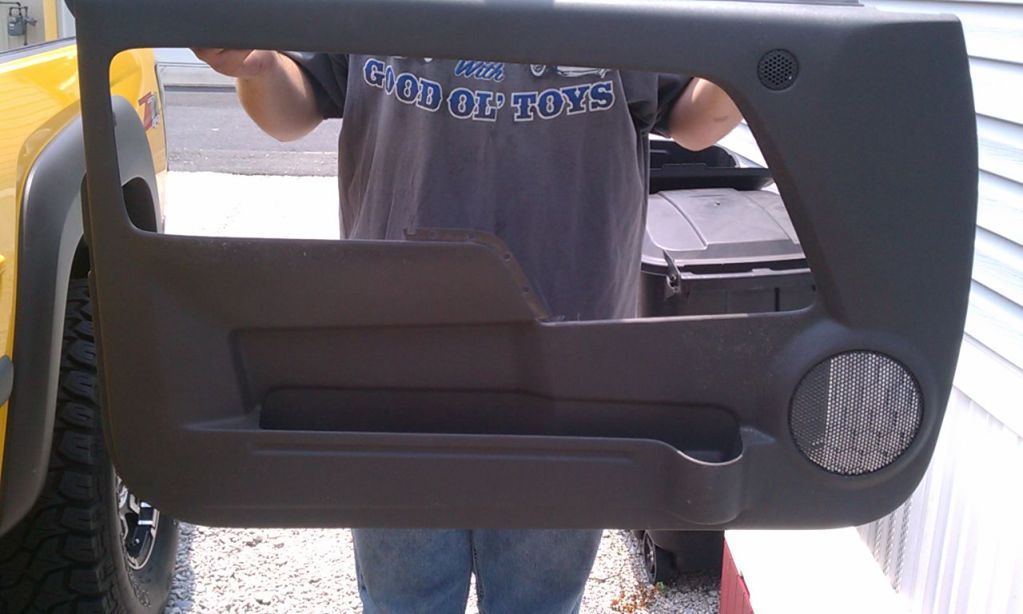
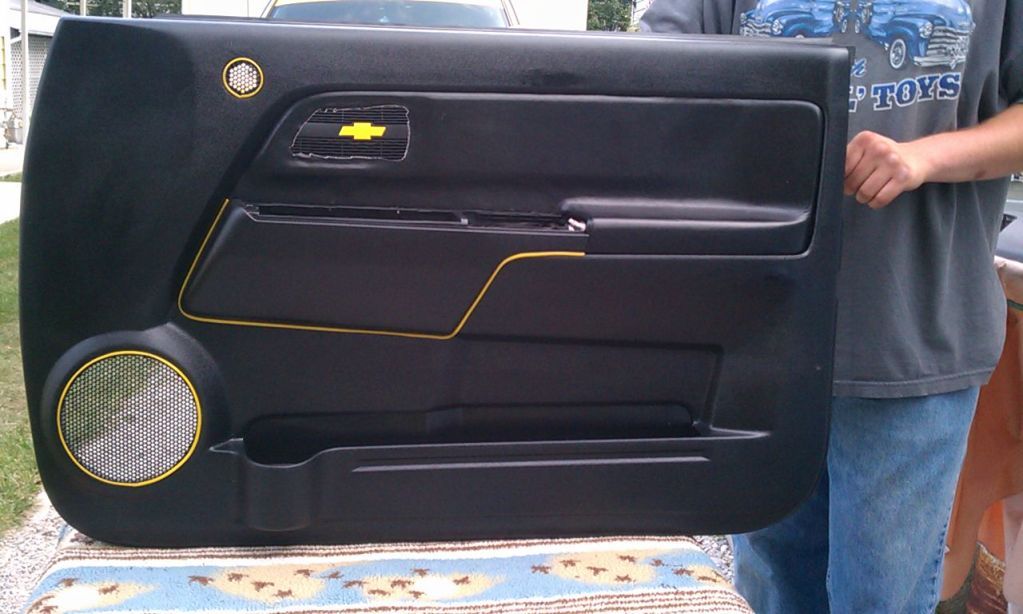
And there you have it!
![Image]()
:355group:
The community here at 355nation.net urges you to please use caution and seek professional assistance when performing modifications to your vehicle. Before attempting any modification it is advised that you refer to your Colorado or Canyon service manual or contact a certified mechanic as not all GMT355 trucks are the same. The staff and the associated members are in no way responsible for any damages, injuries or other harm inflicted to your vehicle or yourself which may result in attempting these modifications. The posts and content presented on this site reflect in no way the views of 355nation.net or it’s ownership.
A 355nation How To presented by
06Stinger (Wayne)
Project Name
Door Panel Mod Update
Project Description
In this How to, you will learn to to remove, dis/reassemble and replace interior front door panels.
Skill Level
Moderate
Project Vehicle
Make: Chevrolet
Model: Colorado
Year: 2006
Engine: 3.5L
Power Windows: No
Sun Roof: No
Tools Needed
- Phillips Screwdriver
- Flathead Screwdriver
- Needle nose Pliers.
- Cordless drill
- 2.5" wire wheel
- Soldering Iron
- Putty Knife
- Plastic for melting/welding.
- Paint. (Optional)
- Vinyl Trim (Optional)
- Upholstered Trim Panel (Optional)
Project Time
2-4 Hours
Project Cost
Dis/Re Assemble Door Panel. $2.00 or less
Add Paint: $8.00
Add Upholstered Panel. (Professional):$40.00
NOTICE: In this how to I'm removing and disassembling the drivers side door panel. (Armrest panel to trim shop) I'm assembling and reattaching the passenger side door panel. (Armrest panel back from trim shop) The process is exactly the same for both driver and passenger side.
Remove Door handle trim
Remove armrest control panel. (Pry from the front to avoid braking the clip)
Disconnect wiring harness.
Release door panel from clips....starting from the lower front. Lift the Panel up to release the weather stripping from the door itself. DO NOT PULL PANEL AWAY!!! TWEETER WIRE IS CONNECTED!!!
Carefully disconnect the tweeter wire. (Have someone hold the panel.)
Carefully grind down plastic welds to release each "rivet" (plastic). I used a 2 1/2" wire wheel. Use the putty knife to help separate the panels.
You can use a soldering iron and melt each plastic rivet. (Grinding is faster and there are alot of rivets. Careful to inspect panel to make sure you only grind the ones you need in order to separate the panels)
More Grinding!!!
It's Free!
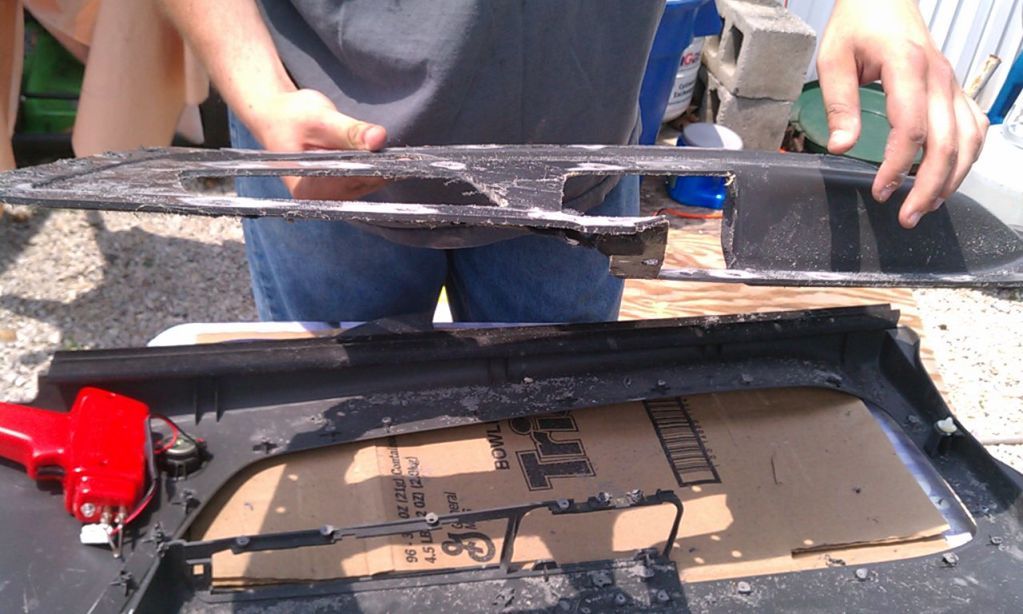
Remove Weatherstripping by locating metal "staples" at either end of door panel. I took this off for paint. Skip this if you're not going to paint.
Pull staples with needle nose pliers.

Straighten remaining metal tabs that are holding strip on and carefully pull upward.
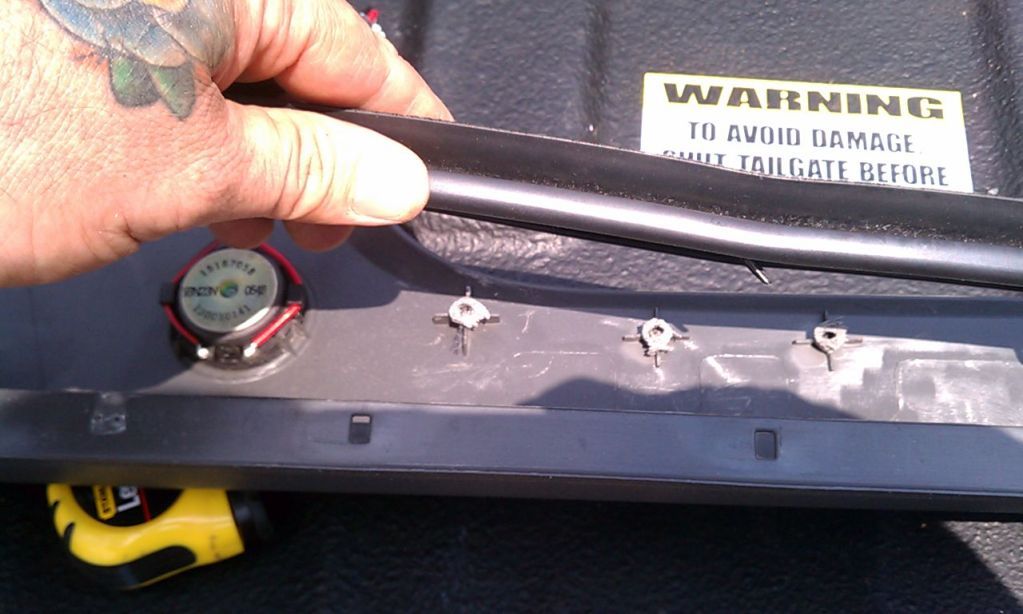
Remove tweeter by using a small screwdriver to release tabs. (Skip this if you are not painting)
Lightly Scuff Panel With Fine Sandpaper. Don't forget to wipe it down when finished. (Microfiber works great)

For my mod, I used Rustoleum's plastic paint....Black Satin to be exact.
I baked it in the sun for one hour. (Just enough time to go get another soldering gun)
I had my panel upholstered by a professional. It cost me $40.00. Consult your local trim shop for pricing.
Prep the nubs to receive the newly reupholstered panels. NOTE: you may have to redrill the holes in the "NEW" panel to accept the nubs....use a brand new drill bit to keep from pulling the fabric.
Use soldering iron to melt the plastic rivets back together. NOTE: Some of the rivets may be shallow from over grinding. I bought a $1.99 cup holder and cut it into pieces in order to add more plastic for the plastic welds.
Rivets.....finished.
Reattach window weather stripping. I omitted the metal staples in the reassembly process. (DON'T FORGET THE TWITTER, IT SIMPLY POPS BACK IN PLACE)
I added some vinyl trim I hand handy to make it "pop" a bit.
Reattach the panel in reverse order. Start by reattaching the twitter wires. "Hang" the panel in the door before refastening the clips. Reconnect the wiring harnesses , reattach armrest control panel and door handle trim with screws.
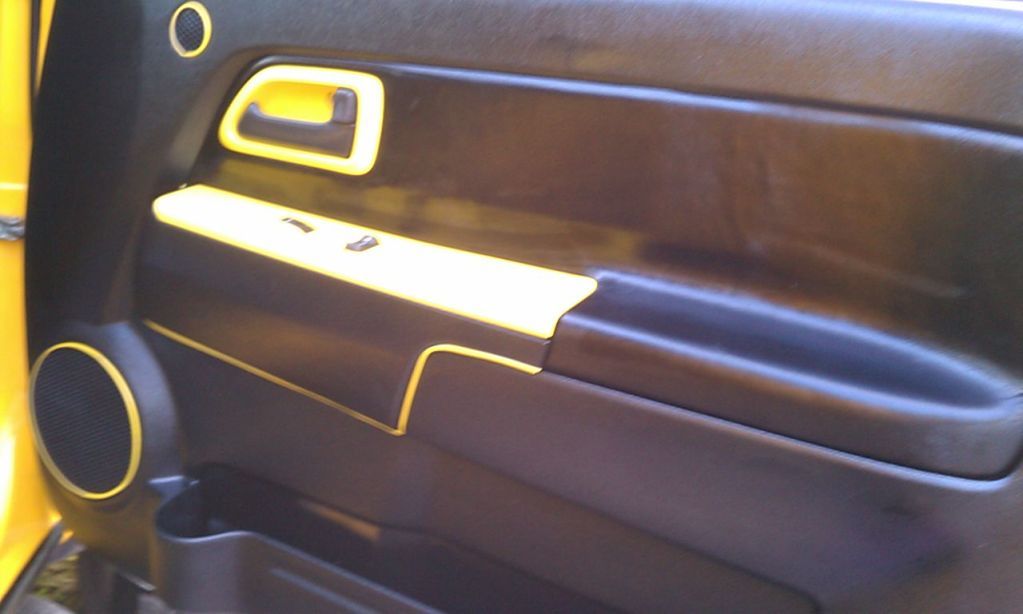
And there you have it!

:355group:


