

Disclaimer
The community here at 355nation.net urges you to please use caution and seek professional assistance when performing modifications to your vehicle. Before attempting any modification it is advised that you refer to your Colorado or Canyon service manual or contact a certified mechanic as not all GMT355 trucks are the same. The staff and the associated members are in no way responsible for any damages, injuries or other harm inflicted to your vehicle or yourself which may result in attempting these modifications. The posts and content presented on this site reflect in no way the views of 355nation.net or it’s ownership.
![Image]()
A 355nation How To presented by
Canyon08Z71
Project Name
How To: Power Window Regulator Assembly Replacement
Project Description
Save some money, when it goes bad you can do it yourself.
Skill Level
Moderate
Project Vehicle
Make: GMC
Model: Canyon
Year: 2004
Engine: 3.5L
Power windows: Yes
Sun Roof: No
Tools Needed
Phillips Screwdriver
10mm Socket and Ratchet
Project Time
Under 2 Hours
Project Cost
Cost of Parts
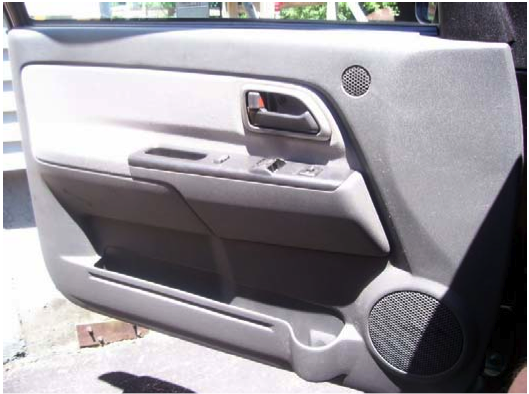
Step 1: Remove the two phillips head screws in grab handle. Take a flat head screw driver and pry the front of the grab handle assembly straight up and out. Disconnect the three electrical connections to the power accessory switches. Remove 1 phillips head screw in door opener handle trim and remove the trim piece. Remove triangle corner piece. Remove Door Panel by gently prying the door skin away from the metal. There are plastic push pins that hold the door on. Disconnect door tweeter connector.
![Image]()
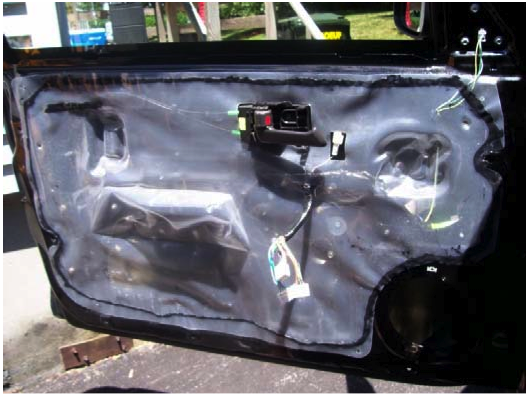
Step 2: Remove plastic seal. Gently pull back on the plastic. Depending on temperature, you may have to use one hand to break the adhesive as you remove the plastic. The adhesive is reusable, so do not worry about needing to replace it. Note: speaker is out because I was replacing it, not needed to remove to do this project.
![Image]()
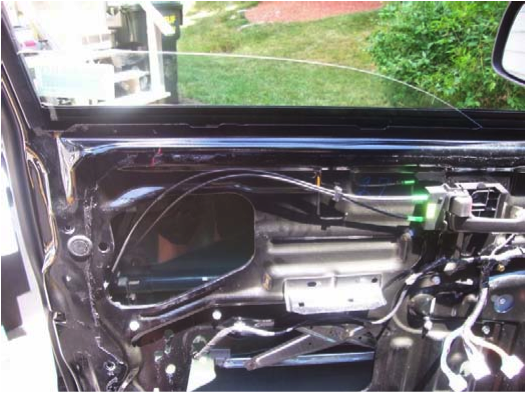
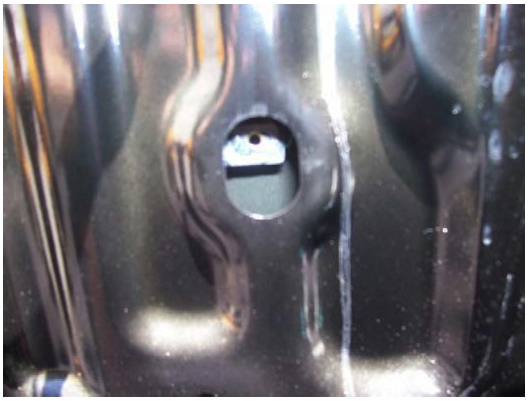
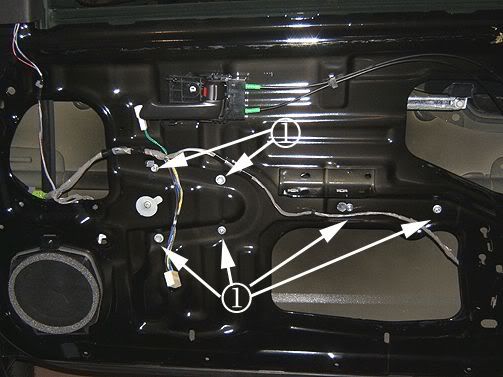
Step 3: Remove two 10mm bolts from the window tabs and remove window. Lift the rear part of the window to get it started and out.
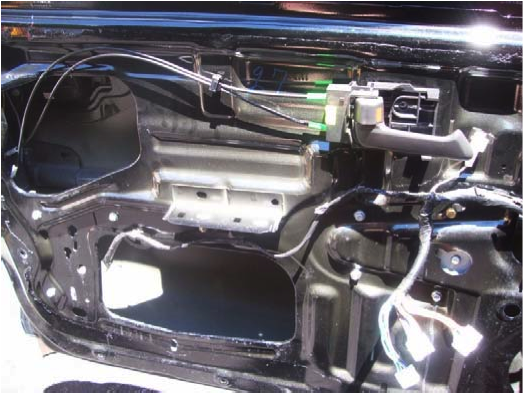
Overview:
![Image]()
Window tabs:
![Image]()
![Image]()
![Image]()
![Image]()
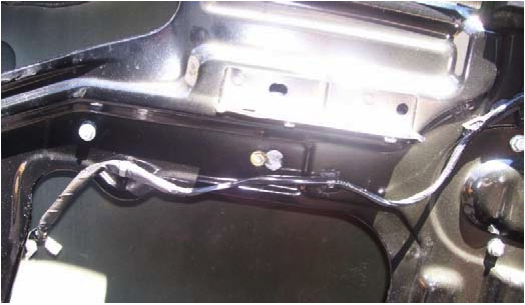
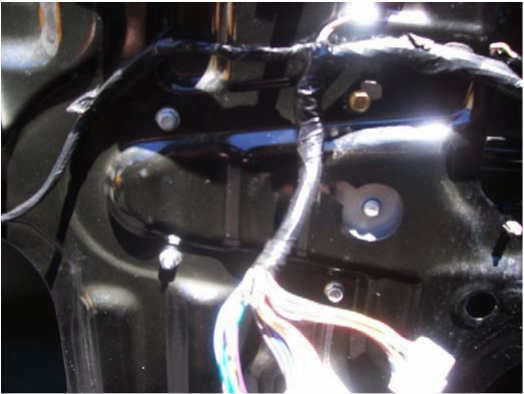
Step 4: Disconnect power from window regulator motor. Remove window regulator. 3 10mm bolts. 3 10mm nuts.
Two 10mm nuts:
![Image]()
One 10mm nut and 3 10mm bolts:
![Image]()
Safely compress regulator assembly and remove it through the large bottom opening:
![Image]()
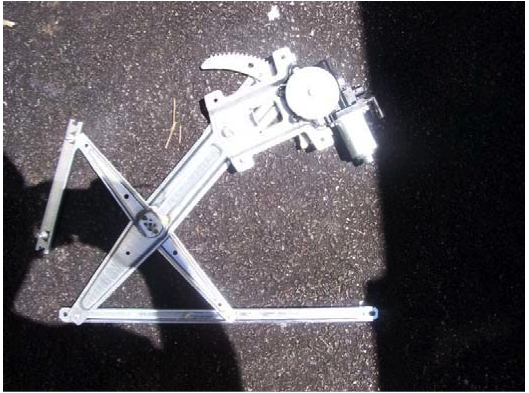
Regulator assembly and motor:
![Image]()
Installation:
Simply reverse your removal process.
The community here at 355nation.net urges you to please use caution and seek professional assistance when performing modifications to your vehicle. Before attempting any modification it is advised that you refer to your Colorado or Canyon service manual or contact a certified mechanic as not all GMT355 trucks are the same. The staff and the associated members are in no way responsible for any damages, injuries or other harm inflicted to your vehicle or yourself which may result in attempting these modifications. The posts and content presented on this site reflect in no way the views of 355nation.net or it’s ownership.
A 355nation How To presented by
Canyon08Z71
Project Name
How To: Power Window Regulator Assembly Replacement
Project Description
Save some money, when it goes bad you can do it yourself.
Skill Level
Moderate
Project Vehicle
Make: GMC
Model: Canyon
Year: 2004
Engine: 3.5L
Power windows: Yes
Sun Roof: No
Tools Needed
Phillips Screwdriver
10mm Socket and Ratchet
Project Time
Under 2 Hours
Project Cost
Cost of Parts
Step 1: Remove the two phillips head screws in grab handle. Take a flat head screw driver and pry the front of the grab handle assembly straight up and out. Disconnect the three electrical connections to the power accessory switches. Remove 1 phillips head screw in door opener handle trim and remove the trim piece. Remove triangle corner piece. Remove Door Panel by gently prying the door skin away from the metal. There are plastic push pins that hold the door on. Disconnect door tweeter connector.
Step 2: Remove plastic seal. Gently pull back on the plastic. Depending on temperature, you may have to use one hand to break the adhesive as you remove the plastic. The adhesive is reusable, so do not worry about needing to replace it. Note: speaker is out because I was replacing it, not needed to remove to do this project.
Step 3: Remove two 10mm bolts from the window tabs and remove window. Lift the rear part of the window to get it started and out.
Overview:
Window tabs:


Step 4: Disconnect power from window regulator motor. Remove window regulator. 3 10mm bolts. 3 10mm nuts.
Two 10mm nuts:
One 10mm nut and 3 10mm bolts:
Safely compress regulator assembly and remove it through the large bottom opening:
Regulator assembly and motor:
Installation:
Simply reverse your removal process.


