Chevrolet Colorado & GMC Canyon Forum banner

P0449 VERY detailed diagnosis and repair video

Tags
p0449
48K views 43 replies 17 participants last post by  dents-n-dings  
#1 · (Edited by Moderator)
I recently needed to fix the common P0449 EVAP valve solenoid problem on my 2006 Colorado W/T. I found bits and pieces of the repair all over the internet (including 355nation) but none of them were complete diagnosis and repair instructions, and many of them showed the solenoid and canister already on the bench without showing how to locate and remove them. Most of them also didn't tell you how to be sure the solenoid was truly defective before you go out and buy a component you won't be able to return if it turns out the wiring or computer are actually at fault.

Eventually I pieced together information from multiple sites and added my own expertise and decided to make a comprehensive diagnosis and repair video for this common Colorado/Canyon problem. This video shows you how to do a repair for about $70 (including taxes) in parts and about an hour of your time that would cost $400-500 if you pay your dealership to do it for you. I've even seen the two parts required for under $40 combined (before tax) from online parts stores, but I bought mine from the dealership.

This video is almost 27 minutes long but it covers EVERYTHING from start to finish, and even gearheads of average skill level should be able to complete the repair in about an hour.

So here you go... my very first YouTube instructional video ever. Hope it helps somebody.

_0qkzTxWCzA

https://www.youtube.com/watch?v=_0qkzTxWCzA
 
#5 ·
That problem is so common?
Hmmm. May be an item to add to the preventive maintenance list.

Thanks for taking time to post the vid!
 
#8 ·
Very detailed video. If a person has the oval plug on their truck they can eliminate the need for the jumper harness by using Vent Solenoid Valve part number 25932571 (214-2149). As mentioned in the video, at some point GM changed the harnesses in our trucks to the square connector. I know the 2011 has the square connector.
 
#11 ·
I have one of the Vent Solenoid Valves that I mentioned in Post #8. I am certain that it will work as I tested it in my truck. It will not require a separate jumper harness. I will send it to you, free of charge, if you will just post here whether or not it worked for you. It is in new condition, I just used it to test the circuits in my truck. It will not directly connect to my truck as I have a square connector. If you are interested, PM me an address.
 
#10 · (Edited)
#14 ·
Depending on which direction that you inject the smoke, you can either test the canister or the solenoid valve. If you are going to disconnect the hose to the solenoid valve, it would be best to disconnect it at the canister, rather than at the valve. At the canister connection, there is a clip that has to be removed to release the connector.
 
#19 ·
I just watched the video............. Well Done, complete and concise

Might need to Sticky this one for sure
 
#20 · (Edited)
I want to add in this thread that some quick checks can be done on the valve while still on the truck.

This applies to 04-06 as I do not know the color of the wires for later models.

So you should have 12V at the Orange wire even with truck off. Now with the truck off you should see the same 12V also at the white wire because the PCM is not commanding a ground to that point with the truck off. If you don't get 12V with truck off at the white or see something in the milivolt range then the solenoid itself is bad and the coil has opened..

If you have 12V at the orange wire and at the white wire the solenoid is OK, you should be able to apply a ground to the white wire and hear the valve open and close by removing and applying the ground wire repeatedly. If you remove the valve and blow air through the line attached to it, the air should come out the top round cap side. If you apply 12V to it and blow again there should be no air coming out. if air is coming out it is bad.

( CAUTION........DO NOT LET THE GROUND YOU ARE APPLYING TO THE WHITE WIRE COME IN CONTACT WITH ORANGE WIRE....IT WILL BLOW THE FUSE AND WHO KNOWS WHAT ELSE WILL HAPPEN WITH THESE PICKY PCM's )

If all is OK then what you can do is remove entire unit ( canister along with the valve ) apply 12V to the orange pin and ground to the white pin to close the valve. Cap off one ports at the canister of then pressurize the canister with very low pressure ( 5PSI or so ) and use a spray bottle with liquid detergent to look for any bubbling leaks once sprayed. or if you have a smoke tester use that.

Image
 
#21 ·
Found the forum while looking to "fix" my 0449 code (have since joined up). Excellent video and description of the troubleshooting, repair, and parts needed. I was able to find both the vent valve solenoid and the adapter harness on eBay for $49.95 with FREE shipping. It arrived within two days and by the weekend had made the repair and cleared the code.

Again, excellent video and description, thanks Martin.
 
#23 ·
Yes, those will fit your truck. However, if you get a part number 25932571 (ACDelco 214-2149) Solenoid Vent Valve, you will not need the wiring adapter.

Note that Amazon will not ship those items international. You can get the part(s) from rockauto.com as they will ship to you. Just do a part number search on their website.
 
#26 ·
DTC P0449: Evaporative Emission (EVAP) Vent Solenoid Control Circuit.

This indicates a problem with the circuit for the Solenoid, not a leak issue. Check the "CNSTR VENT" fuse in the fuse box. Also recheck the connection and wiring at the Solenoid Valve. What was the part number of the Vent Solenoid that you installed? Did you use a jumper harness?
 
#32 ·
I put the new vent solenoid in today, along with the pigtail... my truck is a 2010, and needed the pigtail.

Wasn't a hard job at all.

Just for fun, I took the top off of the old part - I'm sure you've noticed the "lid" that it has. Silly thing had a ton of dust/dirt in it. I wonder if that is what kills these things?

Pulled the PCM fuse, put it back in, then started the truck. Check engine light is gone, and stayed gone all the way to town and back (25 miles) so I'm thinking it's fixed. Thanks for the video, internet stranger!
 
#36 · (Edited)
Did you remove the jumper and check the voltage at the original harness connector?

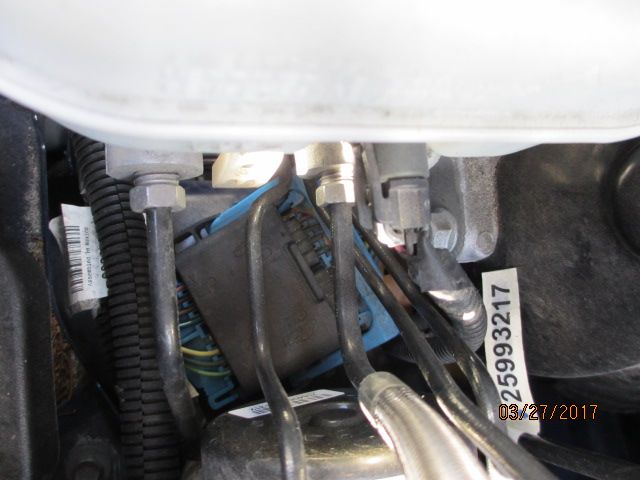
The circuit from the fuse to the vent valve only goes through one connector. That connector is located below and between the master cylinder and EBCM. You would probably need to remove the battery to gain access to it. Check the voltage at both sides of the fuse, not across it. If you haven't done that before, there are two small spots of bare metal on top of the fuse that you can probe. They just look like little dots.
 
#37 ·
Did you remove the jumper and check the voltage at the original harness connector?
Yup, that's where I observed the strange voltage readings. But it's a PWM solenoid so that may have something to do with it.

The circuit from the fuse to the vent valve only goes through one connector. That connector is located below and between the master cylinder and EBCM. You would probably need to remove the battery to gain access to it. Check the voltage at both sides of the fuse, not across it. If you haven't done that before, there are two small spots of bare metal on top of the fuse that you can probe. They just look like little dots.
I'll follow up with this.. thanks again
 
#43 ·
My reason for mentioning the connector is that you are going to be trying to find where, in the circuit, that you are losing voltage and that would be a possible place to check. The wire goes from the fuse through the connector on the bottom of the fuse box, through that connector, and from there it should be a non interrupted wire to the connector. If you are sure that you were getting a good ground when you tested for 12 volts at the connector, then something is causing the loss of voltage. I would first suggest checking the fuse socket to insure the contacts are good. There have been instances of defective sockets in the fuse box for a number of different circuits. Then do a close inspection of the harness in the vicinity of the Canister. At least one guy has reported finding a wiring problem in that area.

The two wire colors for the circuit are Orange for the positive side and White for the ground side (or Low Reference as it is referred to when it is not a direct ground). I don't have access to a 2010 Service Manual, but the 2009 GM Service Manual and the 2011 GM Service Manual both show the circuit going through that connector. You may not be aware, but that connector has 23 wires in it, in three rows of 8 pins each. The Orange and White wires would be in the middle row and not necessarily visible from above.